Sunday September 18, 2005
I spent Saturday fixing up my gas tank. The
process I will detail was explained to me by a professional restorer and
custom auto body shop just outside of Milford Delaware.
-
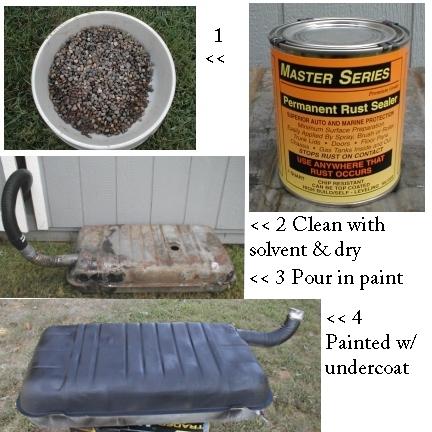
I poured into the gas tank about 3 to 6 lbs of
small gravel stones. The kind of stuff you would use in the
bottom of a flower pot. My wife and I then did an aerobic
exercise with the gas tank basically sanding down the inside of the
tank.
-
After the gravel was removed the tank was
washed out with a gallon of extra strength solvent. The
solvent immediately gave us an indication of where there were
pinholes. The pin holes were fixed with JB Weld.
-
The tank was air dried by forcing the exhaust
from my shop vac into the gas tank. The exhaust from the vac
is warm air and will dry solvent or water relatively quickly.
-
Once the tank was dried out we sealed up the
sending unit hole and poured in a Qt. of special paint designed for
the inside of a gas tank. This silver paint once set cannot be
removed with any type of solvents. It will also plug up pin
holes. We switched the paint around to cover all areas inside
the tank then poured the remainder back into the can. I also
used what was left to paint the exterior of the tank.
-
The next day I painted the top of the gas tank
with undercoat. I will reinstall the gas sending unit and
after it is reinstalled in the car I will paint the bottom of the
tank.
Total restoration cost $30.00. The paint was
$24.00 for the quart can.
|
