• Welcome to 28Q29U Plymouth Forum.
 

News:

NEW FORUM version is here. 
If you are experiencing any problems, contact chetbrz@aol.com
WELCOME Auto Registration is turned OFF. 
In order to register for this forum please contact chetbrz@aol.com to request access.

Main Menu
Menu

Show posts

This section allows you to view all posts made by this member. Note that you can only see posts made in areas you currently have access to.

Show posts Menu

Messages - chetbrz

#856
General Discussion / Need Some Help
February 19, 2018, 06:29:49 PM

I am getting ready to install a new wiring harness and would like to get some pictures of the firewall showing the wiring harness and how it is routed.  I have pictures of Ted's car and I would like to get some other examples so that I can pin down exactly how it looked originally.   Any help would be appreciated.

Chet...
#857
General Discussion / Re: 29 Build Thread - Part 2
February 16, 2018, 07:12:47 PM
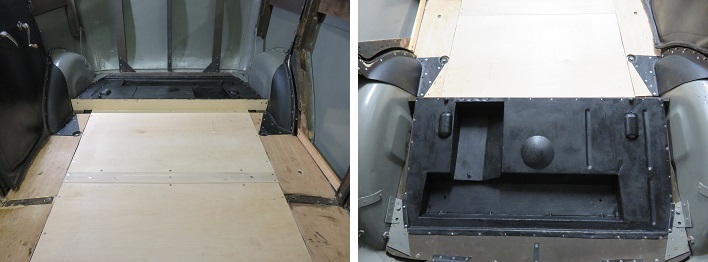
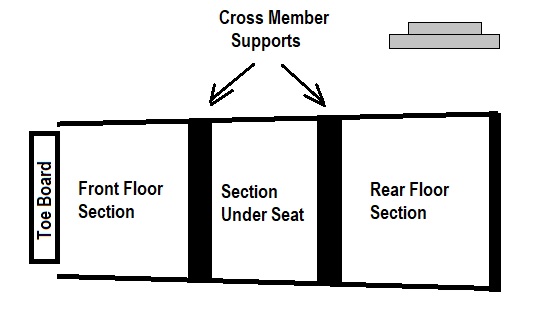
The Full Floor Project

Due to the length of this task and the number of pictures I posted a link to the blow by blow description below:
The beginning may look familiar but keep scrolling down.

http://www.1948plymouth.info/1929/Work_files/2018/02162018.htm


Cheers, Chet...

Link to Build Thread Part 1
http://www.1948plymouth.info/28Q29U/index.php?topic=1102.0

#858
General Discussion / Re: 29 Build Thread - Part 2
February 14, 2018, 07:59:03 PM

Thanks John,

I believe we went down this path awhile back but just needed to check.  Three inches works for me and if you add the height of the metal you get a little more than 3".  It appears that we have a 9 degree cut on the top of the front pan wood support to facilitate the slope of the rear seat pan to the rear frame.  It all logically comes together.  The sides are a right triangle with a base of 17" and height of 3" using math the calculated angle = 9.8 degrees.  I measured approximately 9 degrees.  So I am in the ballpark.

Thanks for the quick response,  Chet...
#859
General Discussion / Re: 29 Build Thread - Part 2
February 14, 2018, 11:35:37 AM
Frank or anyone with a 4 door,

Can you confirm the height of the Rear Seat Pan as 3" from the floor.  It seem correct but just want to make sure.

Chet...
#860
General Discussion / Re: Interesting Accessory
February 13, 2018, 07:31:35 PM

Ya! It's really neat, only about 5.5 inches from top to bottom.  Fan is only 3.25 inches in diameter.  Fan cage is 4" in diameter.
#861
General Discussion / Re: 29 Build Thread - Part 2
February 13, 2018, 07:27:35 PM

Frank,

Is the metal bracket original to the car or added on for extra support ?
#862
General Discussion / Interesting Accessory
February 13, 2018, 05:33:12 PM
The wife & I were rummaging through some antique stores this afternoon and I ran across this Trico Vacuum Fan.  Probably go better with my 48 but I think it might look neat in the 29 ?  Any comments:


It probably came available in the late 1930's. Definitely pre WW2.  I also found this document on the Internet.
#863
General Discussion / Re: 29 Build Thread - Part 2
February 13, 2018, 05:12:26 PM
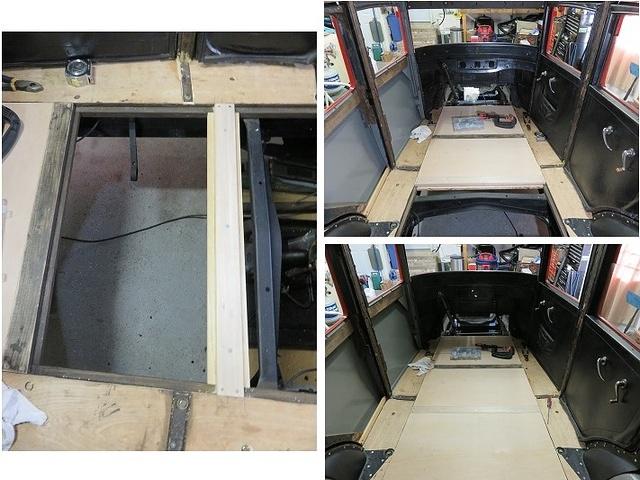
I guess we should have had this conversation earlier.  See picture below, I finished with the floor panels yesterday.


Ted texted these pictures to me this afternoon:


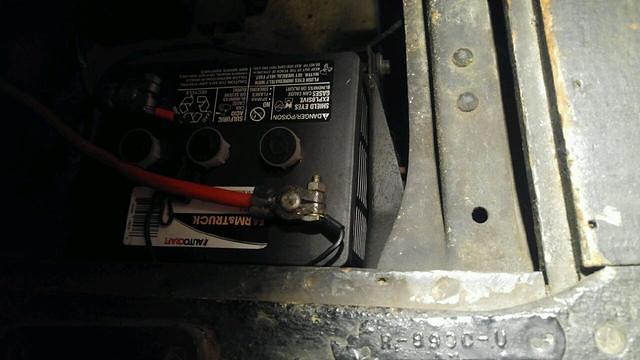
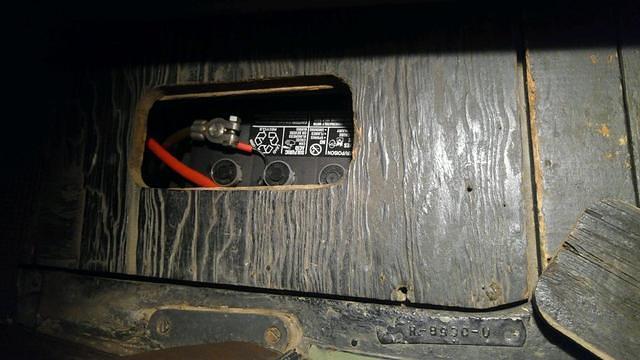
In order to make the entire front section come out to facilitate changing the battery, which is the way it was originally designed, I would have to make new cross members and trash the maple hardwood plywood which was relatively expensive.  With the access door I cut into the front section I can change the battery without removing the entire front floor section.  I think I will leave it like this and let the next guy decide whether to convert the floor back or not.

BTW,

Anyone have pictures of the rear metal pan which is under the rear seat in the 4 dr. sedan.  It would be good to see how this matches up with the floor before I guess at it.  I believe it sits 1.5" off the floor in the front and attaches to the angle metal supports in the rear ???  I think ?

Chet...
#864
Things you are looking for. / Re: steering wheel removal
February 10, 2018, 07:54:14 PM
Quote from: Carson on February 10, 2018, 03:05:06 PM
All I want to remove is the throttle and light


All I want to remove is the throttle and light controls... they are shown in your picture. The part with the horn button and the controls are what I need to remove.

Sorry it's all one assembly. reread the post below again.  Its not all that hard but it is a big pain.  The tubs go all the way through the steering box.

Sorry for being the barer of bad news.  Chet...
#865
Things you are looking for. / Re: steering wheel removal
February 10, 2018, 09:15:53 AM
Hi Carson,

Removing the steering wheel is a little complicated.  You have to remove the light switch assembly at the bottom of the steering column.  Once this is done you can remove the steering switch tubes.  Problem is if your roof is intact the tubes will not clear the interior roof.  You might have to loosen or reposition the steering box to remove the tubes.  See picture below.


Search "Steering wheel" in the General Discussion Category to find how others removed their steering wheel.  In my case my roof was removed for reconstruction.

Welcome to the forum,  Chet...
#866
General Discussion / Re: 29 Build Thread - Part 2
February 09, 2018, 10:10:05 AM
Quote from: racertb on February 09, 2018, 09:12:42 AM
Looking good with the build on the link you provided...a quick question.  The battery box looks to sit parallel to the toe board/cross member.  Is this the way it is on the sedan?  My battery box and access cover sit parallel along the frame between the front seat and pedals.

Hi Ted,

I think we are on the same page.  I would greatly appreciate a picture of your floor.

My battery box does sit parallel to the frame and is between the front seat, pedals and parallel to the toe board (not installed yet).  Maybe the picture doesn't show this but remember I have no motor, pedals, or seats installed at the moment.  I had no original floor to pattern against so I created what I thought was most practical.  I decided on the three sections basically because it seemed practical to me.  Then Dave sent a picture of his front floor which reinforced to me that the designers of the Plymouth were also practical.  So in my case I can't conform to the letter of originality because I have nothing but an occasional picture to go by.  When the car is finished the floor will be covered by rubber matting in the front an a rug in the rear.   I strive for a reasonable facsimile but this is very hard to accomplish without documentation.  Unfortunately documentation is not available or at least I haven't found any.  Always interested in the details, these conversations will help the next guy that heads down this same path.

Good question, Chet...
#867
General Discussion / Re: 29 Build Thread - Part 2
February 08, 2018, 11:28:43 AM
The Front Floor Section

Due to the length of this task and the number of pictures I posted a link to the blow by blow description below:

http://www.1948plymouth.info/1929/Work_files/2018/02082018.htm


Ted... Don't worry pictures will come as progress continues.

Cheers, Chet...

Link to Build Thread Part 1
http://www.1948plymouth.info/28Q29U/index.php?topic=1102.0

#868
John,

You are correct in the outside dimension of exactly 1" also the pipe does seem to be thin.  When you say thin wall I immediately think electrical pipe.  I am sure that you dragged your mike to Lowes or Home Depot to check every type of pipe that they sell including closet and shower curtain poles. 

Here is a link to 1" OD steel pipe.  (May be what you are looking for.)

http://www.onlinemetals.com/merchant.cfm?pid=7775&step=4&id=283&CAWELAID=120293320000035780&gclid=EAIaIQobChMI0Lqbx42K2QIVT7bACh3u7whCEAQYASABEgKDxPD_BwE

I Google 1" OD Pipe

As far as a rivet is concerned a Round head slotted machine screw would suffice especially if you tapped the pipe hole to the screw size.

Chet...

Chet...
#869
General Discussion / Re: 29 Build Thread - Part 2
February 02, 2018, 07:36:22 PM
Quote from: frankp on February 02, 2018, 02:32:47 PM
Chet,

Very snazzy!  is there a diode in the relay?  Does the carb man sell parts?

frank

Check your email.
#870
General Discussion / Re: 29 Build Thread - Part 2
February 02, 2018, 09:57:29 AM
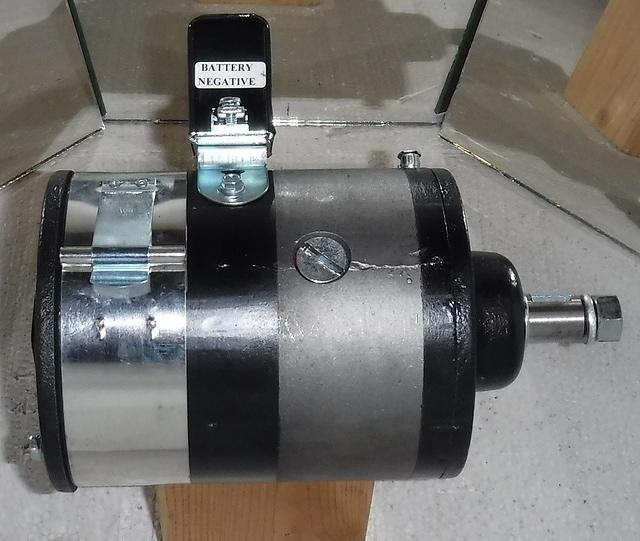
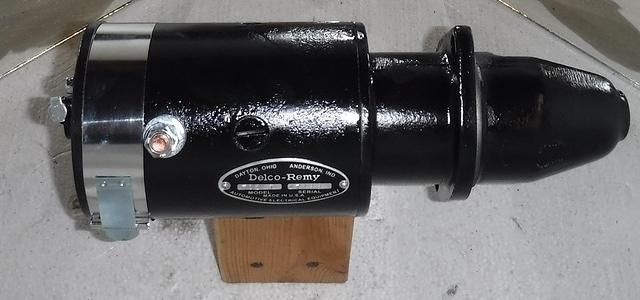
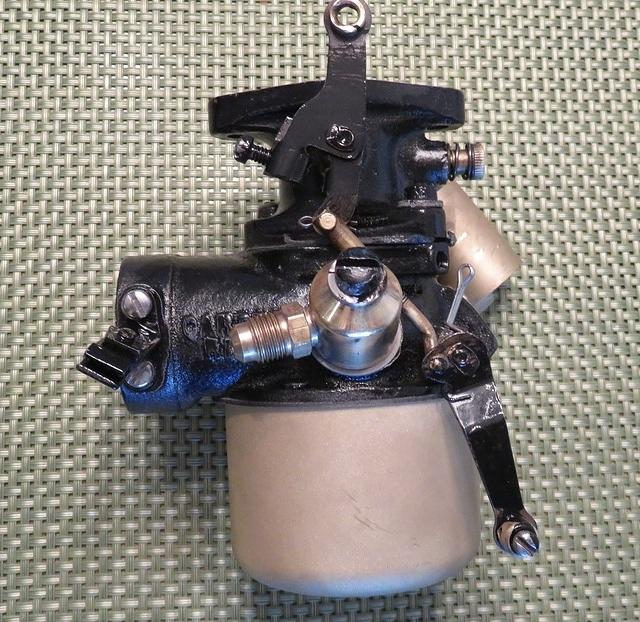
I received the Generator, Starter, and Carburetor back from repair.  The Generator and Starter were completely rewound and all new component parts installed.  See below:


The Starter:


The Carburetor - Looks Good but I am not familiar with the builder so we will have to see how well it works once I get the motor back.  Of course I will get the motor tuned up with my old Tillotson Carb which I know works.