• Welcome to 28Q29U Plymouth Forum.
 

News:

NEW FORUM version is here. 
If you are experiencing any problems, contact chetbrz@aol.com
WELCOME Auto Registration is turned OFF. 
In order to register for this forum please contact chetbrz@aol.com to request access.

Main Menu
Menu

Show posts

This section allows you to view all posts made by this member. Note that you can only see posts made in areas you currently have access to.

Show posts Menu

Topics - chetbrz

#81
General Discussion / Model U Distributor Housing
October 21, 2018, 02:30:59 PM
Just an FYI,

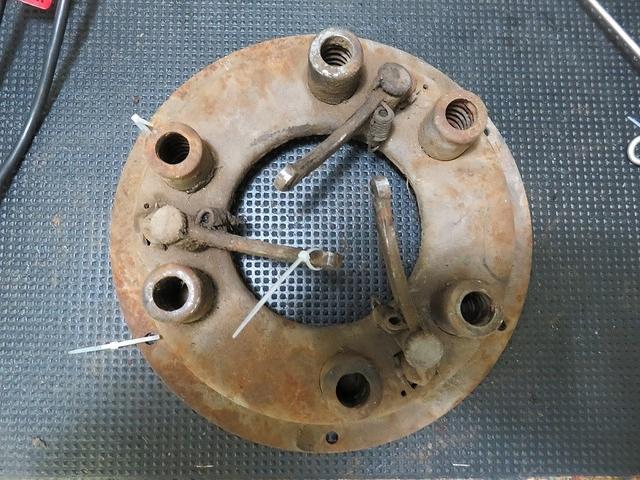
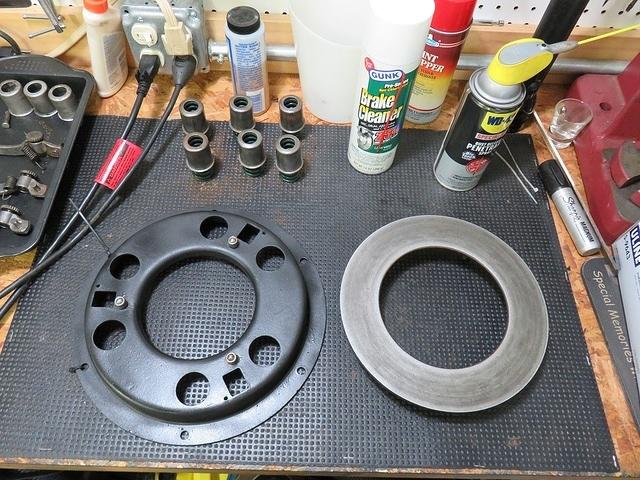
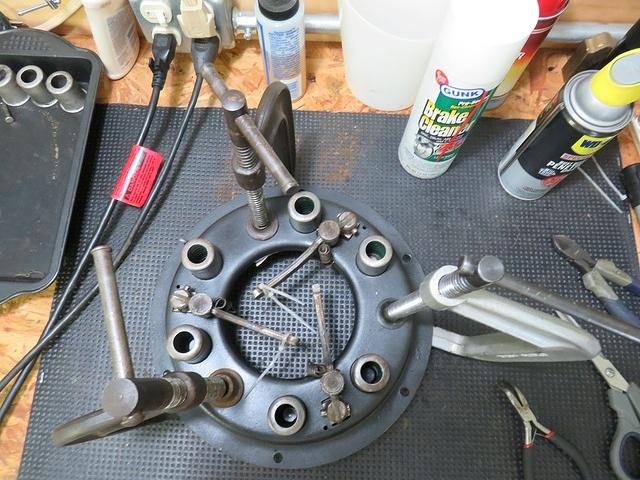
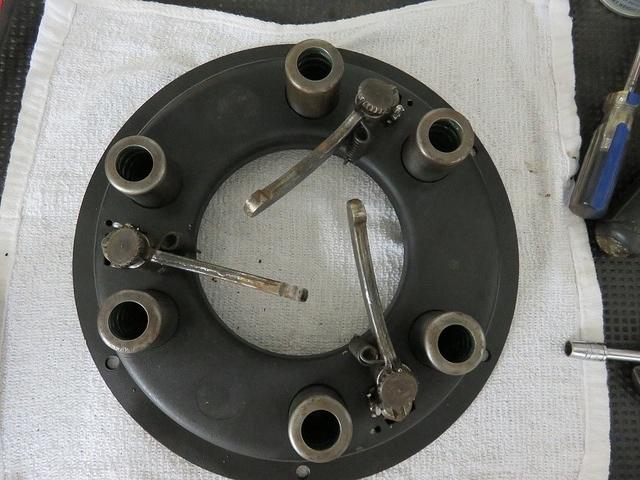
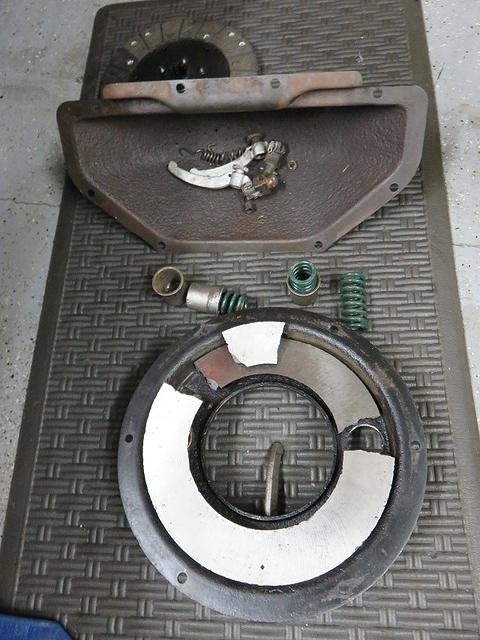
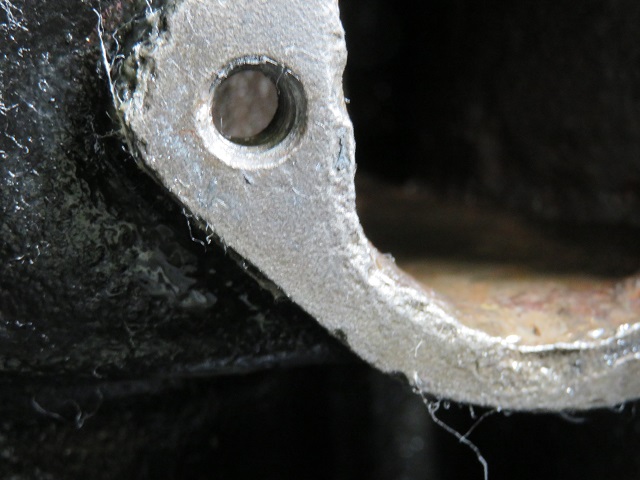
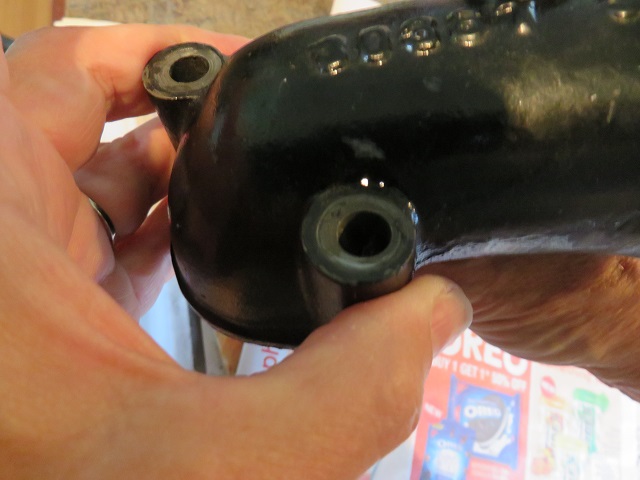
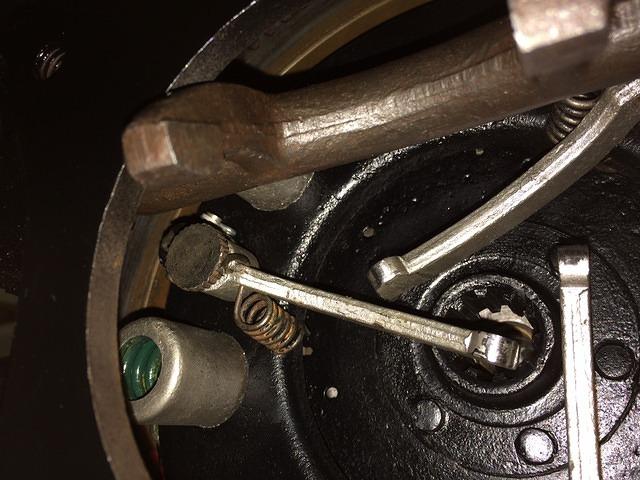
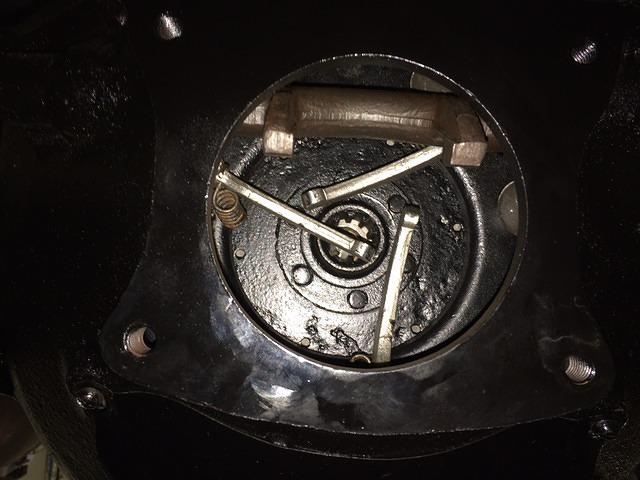
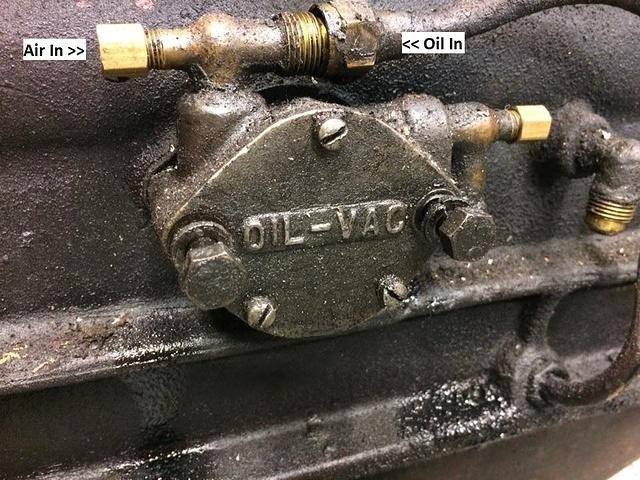
I tried to order a distributor housing from Tom Hannaford at Then and Now but he didn't have any more housings and didn't have any plans to have anymore made.  At least not in the near future.  I purchased the German CNC machined one from eBay and will be receiving it soon.  Heavy cost factor, but it appears that this might be the only game in town for a new part.  $399 USD.  I'll let you know how this all works out mine was on it's last leg and I figured the engine rebuild deserved a new distributor housing.  I did manage to pick up an original part in fragile condition.  Not usable in a car but great for determining measurements for checking or reverse engineering.

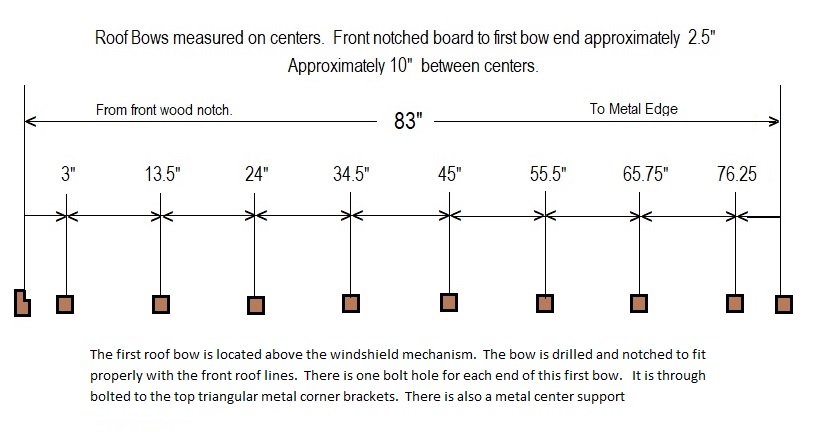
Will let you guys know how this works out but will still have to get my motor back from the shop.  As of last contact.., nothing has be done to it yet.  I have a commitment for these next coming weeks.
#82
General Discussion / Distributor Observation
October 12, 2018, 02:20:48 PM
The Plymouth master parts list for 1929 – 1933 reads as follows for the Distributor on the 28Q 29U

"Distributor Assembly – Order from United Motors Service, Inc. "  Page 101  (8-4)

It appears that the distributor was sold with the base already attached and was not supplied as a separate part.  I was able to research the following Distributors:

The one from my car is a Delco Remy Model – 635T  I also reviewed Delco Remy Model – 638C and Model  630B.  What I founded was that although all three had the same base the 638C and 630B had a different gear set then my Delco 635T

From a glance everything else looks identical.  I was wondering if a mismatch of these distributor bases could cause timing or sputter problems.  Maybe the gear sets basically do the same task even though the gear cut is 180 degrees opposite in design.  Maybe the 638C & 630B are for a Q engine ???

Anyone have anything to add.  Chet...
#83

Just thought I would check in, things here have slowed down considerably but are looking better.  After having to put the motor back into the shop, loosing the electrical service to my work shop, not to mention week after week of rainy days, I haven't been able to gather the necessary enthusiasm to make any forward progress.   

With better weather at hand I was able to trench the 110 feet to my out building and bury a new power line.  Should be back up and running by Wednesday.   Sounds like an easy task but I have lawn sprinklers so needed to hand dig around the Xfinity line, the irrigation, and the Verizon cable.  Not getting any younger but finally done.  Hence the light at the end of the tunnel.

Nothing new with the car but hopefully with power comes progress.

Speaking of trains the wife and I took a ride on a steam train out of Wilmington, DE.  Click on link to see the steam engine.  File is 110 Meg so it might be slow to load depending on your internet speed.

http://www.1948plymouth.info/SupportPages/images/IMG_1293.MOV

Cheers, Chet...

#84
General Discussion / October
September 24, 2018, 07:13:34 PM

Anyone going to Hershey this year ?

October 10-13 -- Hershey Region Fall Meet
#85
General Discussion / Pressure Plate Refurb
August 28, 2018, 08:53:39 PM
I found some enthusiasm today and decided to refurb one of the older style pressure plates found on the Q & U.
The picture below is the one I started on.


The plate itself had a lot of surface rust but no deep dings or scrapes.  So I marked the housing and arms with tie-raps and dissembled the pressure plate.   I used three 'C' clamps to compress the plate for disassembly.  I cleaned and painted the surface areas with heat resistant engine enamel.


I resurfaced the plate by lapping off the surface rust and glaze.  Only took off about 0.006 of an inch.  This left a good thick plate surface.  I used the new springs from my old pressure plate because they were in fact the correct springs.  Below is the assembly using the 'C' clamps to compress the plate so that the arms can be installed.


Below is the finished product.  I think a much needed improvement over my original. 


I am going to use this pressure plate in my car for two reasons.  I like the way it came out and it is the correct plate for my 29U.

Working my way back after some disappointing events.  Motor is back in the shop. 


#86
General Discussion / REPOST from AACA Forum
August 09, 2018, 05:35:14 PM
Reposted from AACA Forum
I purchased 2 clutch/pressure plates from him - surface rust but good restorable shape.
Chet...
_________________________________________

I have the left overs of a 1928 Plymouth 4dr sedan that all the wood had rot out & the body fell apart .. We've all seen it. The body panels of this car found a Man who tack welded it together & put it in his Garden.  I have 1 Rear Fender & a few bits of small tin available along with a Trailer load of Small parts, Just about anything you need it Seems.

Chassis Parts, NICE Frame, Front Axle & springs, 2 sets of Bumpers, 2 SILVER DOME 4cyl engines, 1 other that's not marked silver dome.

Bell housings, Transmissions, clutch parts, Fly wheels ... Bits & pieces .. BOXS of them ....

I'll sell the whole trailer load or just 1 part .... If you have a weird small part like body brace or a small part, It would help us both if you supply a PICTURE of the part your after .... I'm no Plymouth expert

Contact me by TEXT or EMAIL ............ 805-746-9011 Rick or desoto6x2@aol.com


#87
General Discussion / Anyone want to venture a guess.
August 07, 2018, 02:40:35 PM

I have a clunk in the engine and was wondering what you guys might think. I have attached a link to a 44MEG image and sound file for your review.  Depending on your internet connection it will take a couple of minutes to download.  Better to download it first then play the video from your download directory.

http://www.1948plymouth.info/1929/images/IMG_1253.MOV

I sent the link to the builder also ?

Chet...

#88
General Discussion / Pressure Plate Located
August 02, 2018, 10:12:13 PM

Special thanks to forum member Articifer Tom who linked me to a 29 Chrysler owner who had a pressure plate for the 29 Plymouth in excellent shape.  Should be in the mail soon.   :)

But with this being said, at some point these items will dry up.  I have found out much about these pressure plates and many of the venders that supply the rebuilds.  Unfortunately you can't keep resurfacing them forever.   The 4 cylinder Plymouth flywheel is flat so finding a modern equivalent doesn't seem that hard.  You would think that this problem might have had a solution at this point but maybe the demand is to small to make the effort worthwhile.  Might be an opportunity for some reverse engineering.

For those of us like Frank who love to drive their cars this pressure plate issue will come up again.  I was told that the newer style pressure plate can be used in cars from 1928 to 1932.  I think that's a lot of cars still on the road.

Chet...
#89
General Discussion / Good News and Very Bad News
July 25, 2018, 05:05:43 PM
Good News is the Goose Neck water inlet is fixed with no leaks.  The silver solder worked out great.

I got the motor hooked up to battery and gasoline and she fired up no problem.  Never got a chance to check oil pressure because when I revved the engine for the first time the pressure plate exploded.  Not a noise you want to hear after spending a fortune on an engine rebuild.  It sounded like the motor was tearing itself to bits.  The bottom of the bell housing dust pan was filled with debris. 

I removed the clutch and pressure plate and here is what was left.


The clutch and flywheel were not damaged.  I thought that maybe the arms hit the fork for the throw out bearing but didn't see any damage or any indication that the arms came in contact with the fork.  The following pictures are shot from looking down to the right and left of the bell housing and the last picture is looking up from underneath the bell housing.  The fork is tie wrapped in place with no apparent marks from the event.


I guess there is a limit to how many times you can rebuild a pressure plate.
So now I need to source a solution.  Any suggestions ??

Not having a lot of fun at this point !!

#90
General Discussion / OMG Moment
July 22, 2018, 11:53:52 AM
For the past 3 days I have been doing battle with water leaking from the front screw hole of the motors input water flange.  This is the part that connects to the hose running to the bottom of the radiator.  I assumed that water was getting past the gasket and syphoning through the screw hole closest to the front of the engine.  See picture:


I tried every type of gasket seal from RTV to the old standard Indian Head Gasket Shellac.  In each case I let the flange set over night before adding on the first attempt 50/50.., after that, water was less expensive.  Each time to my disappointment the leak would com back dripping from the screw. 

As a last resort I was going to remove the bolts from the block of which one of these bolts would most likely needed to be cut and drilled out.  Don't ask.!!  My intent was to resurface the motor flange.  Finally I decided to stop reacting and start investigating.  Generally if you think something is the problem and you have fixed that problem a couple of times to no success.., generally the problem is caused by something else.

Since doing the something over and over again expecting a different result is the definition of nuts. I decided to investigate other possible causes.  I thought the housing might be cracked or pitted through to the screw hole.  Well it didn't take long to discover this.  See below the part the wife is holding with flash light behind.


OMG...  Pitted holes right next to the front screw !!  The light at the end of the tunnel.


With the bolt in place the water looked like it was dripping out of the screw hole. 

Sometimes you just have to stop and think and not jump to conclusions. 

Do you think this is a job for JB weld ?

Chet...

#91
In the picture below:

Does anyone know what the two screw in plugs labeled 'A' are or were used for ?

Also is the plug marked 'B' above the pressure relief valve able to be used for oil pressure monitoring after the relief valve ?

#92
General Discussion / Bonehead Mistake
July 02, 2018, 12:21:23 AM
When I cranked the engine I forgot completely about the fork for the throw out bearing.  I don't think it is bent just out of position.  Any suggestions.  I sent these pictures to the builder.


#94
General Discussion / Engine back from rebuild.
July 01, 2018, 07:49:15 AM
Looks good.., hopefully runs as good as it looks.


Need to run it ASAP.  I guess I might mount it back in the car just so I could hook up the radiator and fire it up with the bare minimum.  Right now still sitting in the back of the pickup.

This is the note I got from the rebuilder:  Any additional suggestions ??

Hello Chet:

Break in sheet is that once engine has oil we recommend 30 weight detergent with zinc Brad Penn brand is good to use.  Where this engine is full pressure and has pressure regulator on drivers side under the cover you may need to adjust it to get best results.  I left it at previous setting, it may be too much now since engine is rebuilt.

Once engine is started you will run for five minutes and stop. Let engine cool off and retorque cylinder head nuts to fifty lbs.  We would also recommend that you fill cooling system with water initially and liquid block sealer "Bahr's Leak" comes in pint bottle to seal studs and head gasket.

After this is done You can restart and break in camshaft by alternating engine on fast idle up and down the rpm range for at least 30 minutes.  I would recommend you have at least an hour of run time on the engine before changing the oil.  Again you can use 30 weight detergent.

It's a simple engine and really straight forward.

I would recommend periodically checking torque on head gasket as well as all bolts and nuts on engine . The engine heats up and cools down the gaskets will expand and contract needing to have bolts and nuts retightened.

Any questions please ask.

Thanks  John 


Chet...
#95
There were some great questions and observations concerning the Oil Pump from Dave's Resto Project Thread.  So we don't highjack Dave's Thread.., I started this new thread as a continuation from that discussion.

rwollman,  I am not familiar with the Model Q - Maxwell engine.  I am attaching a picture of the Model U Chrysler engine showing the pressure release valve. 


This is a picture of the Oil-Vac pump on the Model U engine.  It appears that Oil-Vac are created as a combination of the total volume of both that is moved by the pump.  So it would be logical if you capped the vacuum side you would make up the difference by pulling more oil.  Also if the ID of the vacuum opening was bigger than designed you would logically pull less oil.  What the ratio is would take some experimentation. 


It appears that there is a very precise balance between all these items to come together to create the correct result.  I would think that oil viscosity could also play a role. 

Any thoughts.
#96
General Discussion / 1929 Weatherstrip - Questions
April 15, 2018, 11:12:06 AM
Question:

  • Was there weather stripping around the door frames.  If so, anyone have any pictures ?
  • Also interested in how the hinge pillars are weather sealed ?   
  • Was there a metal rear window frame, I don't believe I have one.
After the plating snafu I may be asking many more...

Pictures of original interior appreciated. 

Chet...
#97
General Discussion / Paint Chips for 28/29
April 12, 2018, 03:34:11 PM
Anyone have a paint code or chip for Marquette Blue and Marine Blue ?
#98
General Discussion / 29 Sedan Roof comments welcomed
March 12, 2018, 02:20:16 PM
Dave sent me some excellent pictures of his original roof along with measurements.  I created this diagram to be my work note reference for the positioning of the roof bows during the construction of the roof for my 29 sedan.  If anyone has any additional info I would greatly appreciate it.  I already have a template for the slight arc of the roof.

See diagram below and any comments welcomed.


Hopefully the weather warms up this week as we head toward the weekend.

Thanks, Chet...
#99
General Discussion / Need Some Help
February 19, 2018, 06:29:49 PM

I am getting ready to install a new wiring harness and would like to get some pictures of the firewall showing the wiring harness and how it is routed.  I have pictures of Ted's car and I would like to get some other examples so that I can pin down exactly how it looked originally.   Any help would be appreciated.

Chet...
#100
General Discussion / Interesting Accessory
February 13, 2018, 05:33:12 PM
The wife & I were rummaging through some antique stores this afternoon and I ran across this Trico Vacuum Fan.  Probably go better with my 48 but I think it might look neat in the 29 ?  Any comments:


It probably came available in the late 1930's. Definitely pre WW2.  I also found this document on the Internet.