• Welcome to 28Q29U Plymouth Forum.
 

News:

NEW FORUM version is here. 
If you are experiencing any problems, contact chetbrz@aol.com
WELCOME Auto Registration is turned OFF. 
In order to register for this forum please contact chetbrz@aol.com to request access.

Main Menu
Menu

Show posts

This section allows you to view all posts made by this member. Note that you can only see posts made in areas you currently have access to.

Show posts Menu

Messages - chetbrz

#1321
General Discussion / Paint do-over three years later: OT
November 02, 2013, 06:47:40 PM
My car was painted in October of 2010.  The paint came out great but as time went on I had problems with the primer pushing up dimples in the finish coat.  The painter really stood behind the job he did and I just received back the car today after 3 weeks in the shop.  The painter sanded the car back down to the metal, new primer, and multiple coats of finish paint.  We used a black primer to darken the paint color.  The car came out pretty close to perfect. 

Painter did all this at NO CHARGE to me.  Only in rural America. !!!


It doesn't get much better then this:


Back to the body belt.     Chet...
#1322
General Discussion / Re: New to the forum...
October 31, 2013, 07:11:53 AM
Quote from: Crazydave on October 30, 2013, 11:03:44 PM

http://s466.photobucket.com/user/crazydave4455/slideshow/1929%20Plymouth%20U?sort=3  

I think I'll start a restore thread for this car, and update just that with my issues, frustrations and observations.

Dave

Hi Dave,

Welcome to the forum.  Really nice original car in great condition for 84 years old.  Nice picture book, your car has great potential.   You may also want to consider the Plymouth Owners Club 4 cyl experts as another resource for authentic restoration info.

Good luck,  Chet...

Chet...
#1323
General Discussion / Re: Barn Find Redux
October 28, 2013, 10:30:13 PM
Quote from: frankp on October 28, 2013, 11:05:39 AM
Chet,

I think so, too.  It appears the spare tire can be placed in side as the bottom is not fully enclosed.  An advertisement shows it unlatched and folded down to hold milk cans, groceries, packages or whatever fits.

Another item was the hand crank.  It was long enough to extend through the slats in the bumper.  There was a metal guide attached to the bumper to prevent any damage.
No pics of these.

frank

Frank,

I believe the long crank is the proper crank to start the car.  I think the short cranks that we have were used to turn the motor while doing service ?  I don't remember who told me this but that's what I recall.

Chet...
#1324
General Discussion / Re: new roof
October 28, 2013, 10:22:58 PM

Really nice Ian, enjoy your car it's looking good.  I pick up my 48 Plymouth from the painter tomorrow.  This is the second time it's getting painted.  There were problems with the paint after a year and the painter took the entire car back down to the metal and reprimed it and new finish coat.  Second time is the charm & no charge.   :o

Chet...
#1325
General Discussion / Re: Barn Find Redux
October 27, 2013, 05:17:31 PM

Really cool Frank,   Chet...
#1326
Des,

I don't know if this will help you but according to the Master Parts List I don't see a different part number from left to right side.  I do however see a different part number for model U after SN: RR-593-Y for US and after model U Canadian build after SN: GP-707-C.

The older Q & U was 43694 and for the newer U after the SN# change is 301470 this last number can be substituted with 301473 which includes the early built PA's

Point is in all cases the left rear plate and right rear plate is the same.  2 per car.

Chet...
#1327
General Discussion / Re: Motor Oil 101
October 15, 2013, 08:17:24 PM

Wow !!!   Great blog on oil.  This really explains a lot.

Thanks Ted
#1328
General Discussion / Re: Another question to ponder
October 15, 2013, 08:58:01 AM
Thanks Ian,

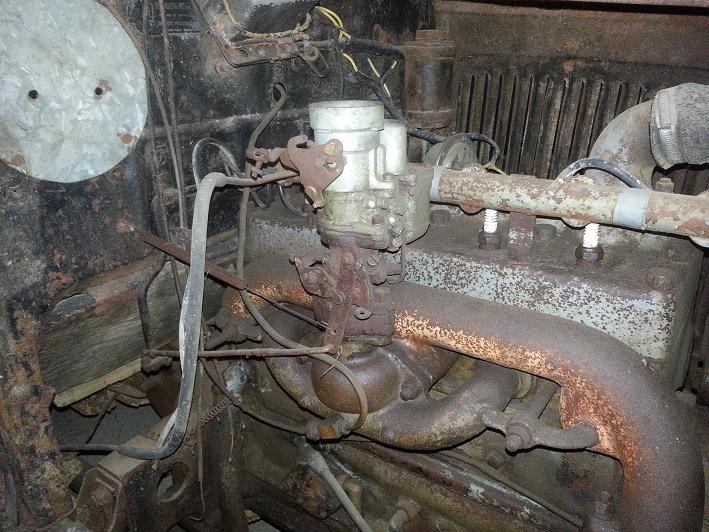
Here is a picture of Gordon's setup and his comments:


***********************************
I found a similar carburetor as mine on the Plymouth. I think the carburetor on the car is a Carter WO 146-249 from a willis jeep from the second world war. This makes sense. The old carb was bad and after the war are enough parts from the left war vehicles in France available.

I will rebuilt the engine and the carburetor as it is. If the engine is running good with the carburetor I keep it. If not I will look for an original one.

An other problem:  the master brakecylinder. Here it is the same. It is not the original one. But in that case I don't know what it is. Have You a source were I can buy a rebuilt original part?
*********************************************

Ian,

I think your exhaust manifold may have been changed.  I don't think you can reverse the original manifold and still have the output pointing down, but I am not all that familiar with the 28Q?

Chet...
#1329
Quote from: Des28Qau on October 13, 2013, 09:16:45 PM
Hi all, Des from Melbourne Australia.
The one thing I am not on top of yet is the rear brake mounting plate, as left and right have different plates.
One has a larger hole that goes around bearing ~69mm flat hole, and the other ~54mm ~2.1" rounded/rolled radus hole.
I do not know if the axle housing is original Q or other, I assume Q.

Thank-you Des.


Des,

Hi & Welcome,

It is hard to tell from the descriptions what exactly is going on.  They say one picture is worth a thousand words.  A picture of the brake mounting plates showing the current setup would be a good starting point.

There are two ways to post a picture.  If you have pictures on the web you can post a link to the pictures by using the "Picture Icon in the Post reply screen".  Or you can upload a picture to this site but I would suggest decreasing the size to about 250K each picture.  You can post up to 1 Meg per picture but not really necessary and will only take up disk space on the server.

Cheers,  Chet...
#1330
General Discussion / Rainy Day Project
October 12, 2013, 03:58:28 PM
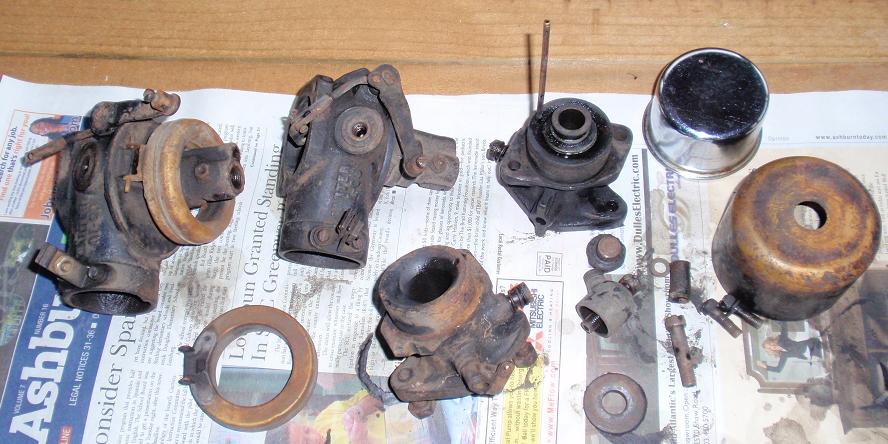
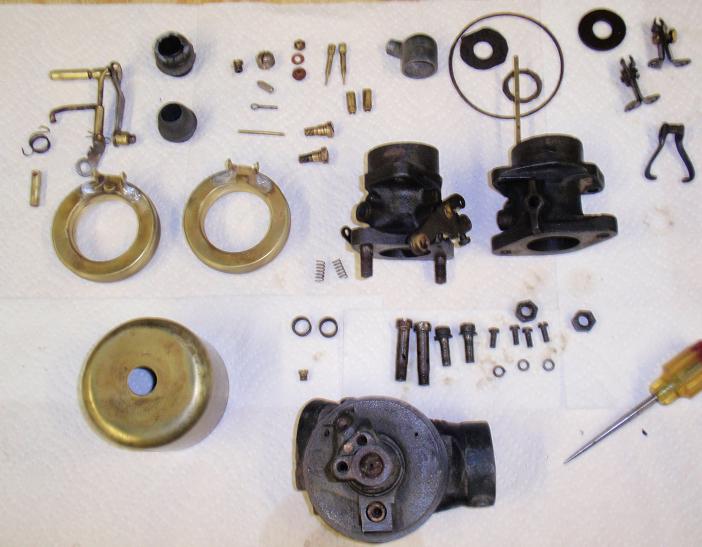
Well I decided to clean out the parts washer which I haven't used in a couple of years.  The parts washer was basically being used as a surface area to collect more useless garbage.   I found the pieces of two RT08 Carburetors which I picked up a couple of years ago and left them in the parts washer to soak.

I spent Saturday trying to get enough of parts from both to make one.  OK also found an old chrome oil cap.


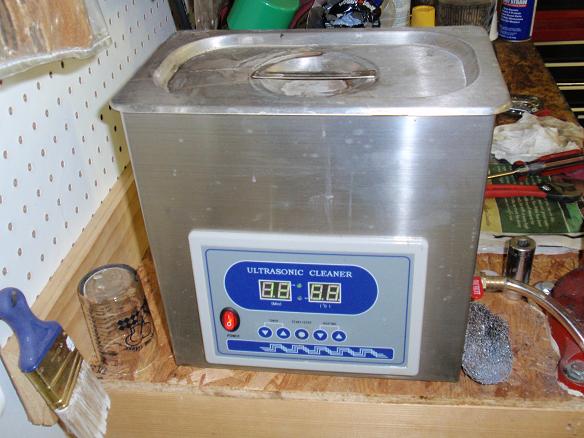
Getting the pieces apart without damaging the pot metal and the venturi tube required many passes in the ultrasonic wash and then a little nurturing with penetrating oil.  Not to leave out a couple of years soaking in the parts washer.!!!


Some parts were sacrificed to retain others but I was very lucky and the end result produced enough good parts and a good casting to make one RT08 carb.  Whether it will work well or not remains to be seen.  I think I may have a good chance for success.  BTW  I do have the full factory Carter assembly & adjustment document and will post it in the tech area once I find it.


Does anybody know what paint was used on the carburetor?  I have basically seen the main casting painted black and maybe use that simulated carburetor finish paint on the butterfly top section.  I don't have an acceleration pump but these carbs work fine without the additional pump.  I know somebody manufactures the long one in Brass but here again very expensive.

Chet...
#1331
General Discussion / Re: Another dumb question
October 12, 2013, 12:43:41 PM

Thanks for the picture.  Now if I ever run accross these things in a yard sale for 50 cents each I guess I shouldn't try to talk the price down.

Many Thanks,  Chet...
#1332

It's been raining here in Virginia non stop since yesterday morning and the weather forecast for Saturday is rain maybe clearing in the afternoon.  Hershey is forecasted the same.  Good grief,  the parking fields must be a mud track.  Oh well, maybe next year.  I'm going to pass this time.   Probably pick up some good deals under the tarps if you can find what you are looking for.  I feel bad for the people and venders who have been looking forward to this event, myself included.

LOL,  Chet...    :'(
#1333
General Discussion / Re: Another dumb question
October 10, 2013, 07:51:07 PM
Quote from: Old Man on October 10, 2013, 04:33:31 PM
The reason there is a grease cap on the wire wheels is because they took the 1st hub caps/wheel discs for Plymouth. (I have a set on my wall.) They would require a something to hold the grease in place or at least keep it from spining out into the rear of the fancy new hub cap.

I absolutley understand about the use of the grease caps with the wire wheels but what do you mean by your statement, " ...they took the 1st hub caps/wheel discs for Plymouth. (I have a set on my wall.) ".  Do you mean these first Plymouth hubcaps for the wire wheels ?  A picture would help.

Sorry if I am misunderstanding your statement.

Chet...
#1334
General Discussion / Re: Another dumb question
October 10, 2013, 02:18:59 PM
Quote from: Gary 30U on October 10, 2013, 01:06:16 PM
Chet, Thanks for the nice comments about our web site.

I couldn't sleep last night thinking about your wheel problem. I have come to the conclusion that it is probably the spokes. If they were just 1/8" wide face to face then the drum would be set in that far. It could be 1/8" on the front or back face or as little as 1/16" on each, but the result would be the same. I measured some old spokes I have off of two different cars and one set measures 1.256 ( presumably 1.25) and the other measures 1.267 just over the 1 and one quarter inches.

I didn't take a wheel off to see how far the hub extended past the drum. If you want I could do that relatively easy.

Hope this helps.

Happy Motoring, Gary

Well that pretty much confirms the problem.  The new wheels measure 1.5" with a straight ruler given an error factor probably +/- 1/16".  Over the weekend I will measure with a caliper.  Probably a little less then 1.5 but definitely not an inch and a quarter.  Besides the drums are painted with primer filler and then top coated so that added to the issue as well as the lacquer on the wood serface.  Might just have to sand off all the extra paint and lacquer where the drum attaches to the wood spokes.  Only interested in the additional serface diameter added to the inside section between the wheel and hub.  This would be approximately half the difference between your wheel measurement and mine. 

So ~ (1.500 - 1.250) / 2 = 0.125" or 1/8"   Perfecto !

Tks Gary,  Chet...

#1335
General Discussion / Re: Another dumb question
October 10, 2013, 07:13:33 AM

Hi Gary,

Your Cascade Region seems friendly and progressive.  Great website.  I was part of the Mid-Atlantic region for awhile, created a website for the region but nobody logged in.  Their meetings and activities were held in Maryland which was quite a drive for me so I gave up on the region.  I have been encouraging the POC to create a stronger presence on the web to include the disconnected majority of members who do not have a local region.  Basically an Internet Region but didn't get much buy in.  OK so now I am basically going off topic.

As far as the wheels are concerned I also considered that the wood wheel thickness might be a tad to large.  These were obviously respoked recently.  There are a number of suggested solutions so I am sure a resolution is at hand.

Keep up the research everyone benefits from knowledge.  That's why I created this website.  I have received help from so many people over the years from web sites like this and your region's.

Chet...