Running Board Redo February 3 - March 15, 2008
February 3, 2008
I started the refurbishment of my running boards. I
am using a good 3/4 inch exterior finished plywood. Also as Trim..,
aluminum cap moldings.
|
Parts List
-
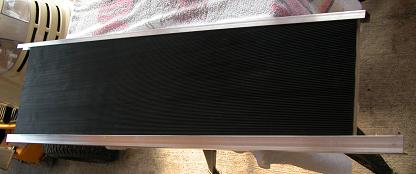
23/32x2x4 Sand Pine
Plywood..................$ 16.53
-
2 Aluminum
Caps........................................$ 16.14
-
8 T-Nuts with prongs, 5/16 -
18x3.............$ 8.328
-
Hex Bolts 5/16 x 18 x 1"
...........................$ 2.08
-
1/8" Ribbed Rubber
material....................$ 55.00
Total Cost to date: $ 98.07
|
|
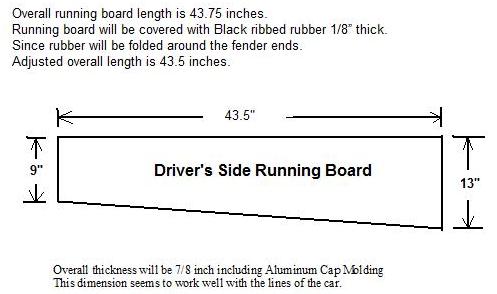
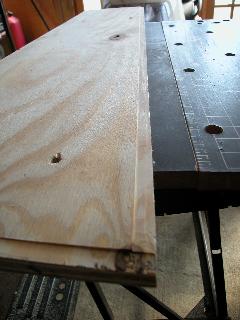
Step 1
-
I removed the old running boards and took careful
measurements.
-
The measurements are typical from the driver's side
to the passenger side.
-
If you flip the diagram above it would be typical to
the passenger side board. The view to the left is the
passenger side.
-
At this point the overall thickness of 7/8 of an
inch seems correct..., of course if in the final assembly additional
thickness is needed I can always glue on an additional 1/8 or 1/4
inch ply to the bottom of the running board to ensure a clean fit.
If that is the case I will add the appropriate painted aluminum cap
to match.
|

|
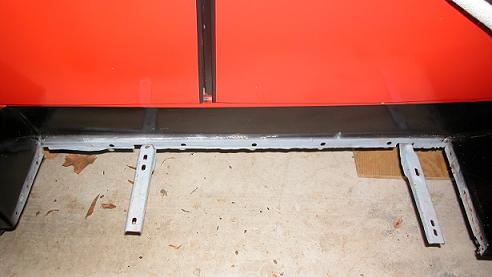
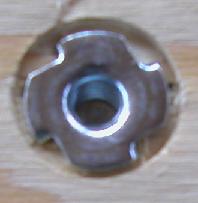
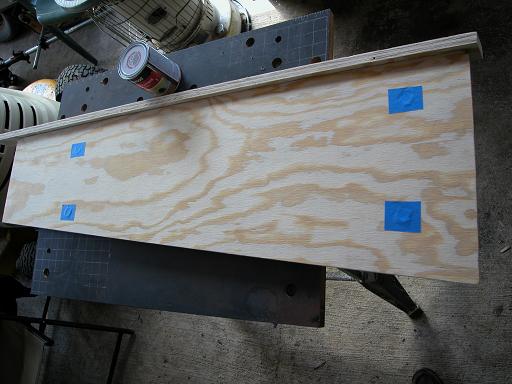
Step 2
- I cut the boards and inserted Pronged T nuts so the board can be
bolted into place from under the car.
|
|
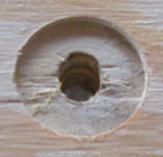
Step 3
- I drilled the surface with a 1 inch flat wood drill to ensure
that the T nuts were flat with the finished surface.
- When I glue on the rubber I will cover the T Nuts with masking
tap so that the glue doesn't get down into the nuts and push up on
the rubber surface when I screw the boards into place.
|
The work continues...
02/24/2008 |
|
|
Step 4
|
|
Step 5
-
I covered the pronged T nuts with tape to keep the
contact cement from getting into the threads.
-
I applied contact cement to the wood surface and to
the rubber mat.
-
Then I allowed the glue to dry and used a piece of
cardboard between the wood surface and the rubber mat . This
way I could position the rubber exactly where I wanted it.
-
I slowly pulled the cardboard out and allowed the
rubber to bond with the wood.
|
|
Step 6
-
Now the hard part. Fitting the trim.
Because of the irregular angles a miter box couldn't be used.
-
Originally I cut the wood boards to allow 1/8" on
each side for over lapping the rubber. Since I used the 1/16"
channels I needed to shim the aluminum end pieces out with 1/16"
shim stock.
-
I must say this was the hardest part of the project.
Getting the angles correct. The overall length was a perfect
at 43 & 3/4 inch
|
Well I think the finished product came out well and you can't
beat the price.
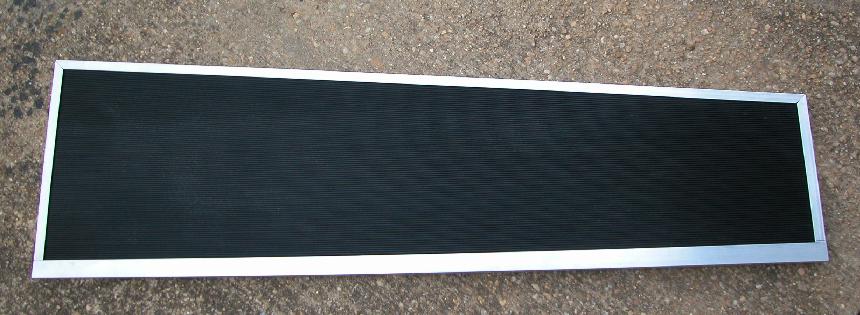
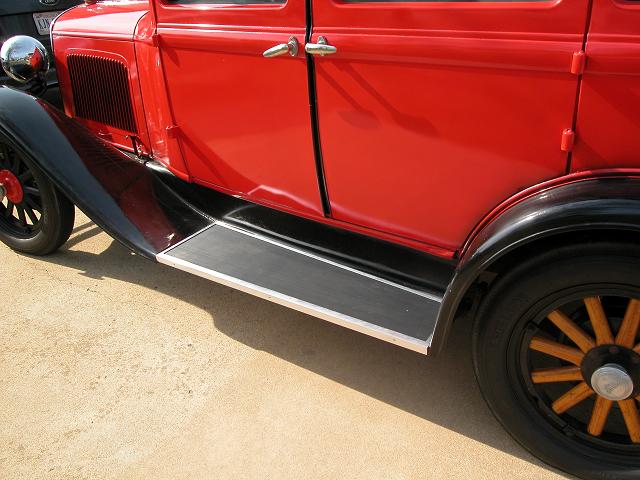
Saturday March 15, 2008
I installed my homemade running boards and I think they look A-OK. They
should serve me well until I can find some original parts at a reasonable price.