The Hinge Pillar Assembly
With the driver's side Sill in place I shifted back to fitting the rear Hinge Pillar. Before I start on the passenger side Sill I need to get the rear driver's side body section stable so that I can remove the Sill member. By installing the hinge pillar and the assorted window frame parts along with the rear iron support, this will adequately stabilize the rear section.
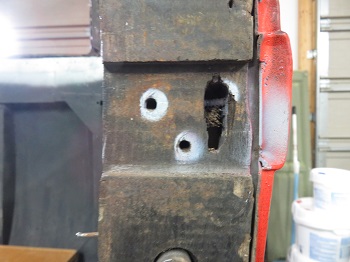 |
In order to finish up the Hinge Pillar I need to mortis in
the 3 hinge spaces as well as the window regulator panel and
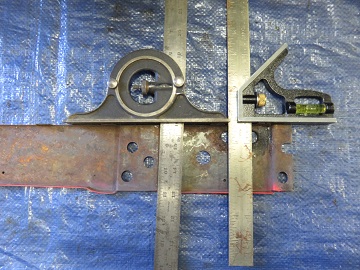
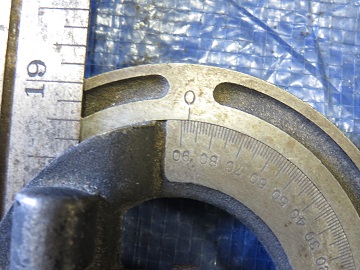
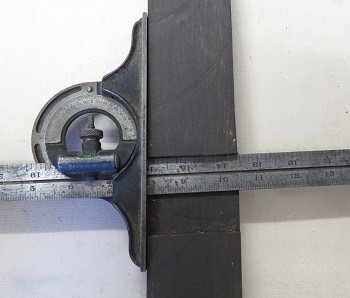
the bottom door strap assembly. After inspecting what was left of the original Hinge Pillar, I noticed that the hinge spaces were mortised at an upward 2 degree angle. Both sides are like this so my guess is that this 2 degree angle may facilitate the door movement so I made sure that my reproduced hinge pillar mimicked this upward 2 degree angle. See additional pictures below. |
 |
 |
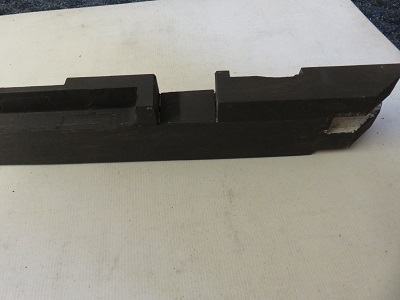
Below is my fabricated left rear Hinge Pillar assembly. This is a very complex piece which required a great deal of time to build. One mistake when routing the cut ins might require starting from scratch. I would estimate a total of 24 hours completing the two pieces which make up the entire Hinge Pillar Assembly.
 |
 |
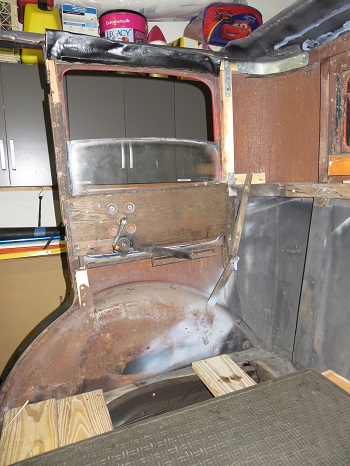
Before I install the new wood I sanded, wire brushed, and painted the interior metal to help protect against future rust. While the paint is drying I will start disassembling the passenger side to prepare for the sill replacement and new wood frame construction
 |
 |
With the paint dry I installed the Hinge Pillar utilizing clamps to hold it in place. I had to make some slight adjustments to get it to line up properly but that was expected. Unfortunately I can't install the Hinge Pillar until I create the back window structure and the rear window frame member. (Items B & C) I do not need to create the window crank assembly at this time but will have to route (item C) frame member to accept the window crank assembly board.
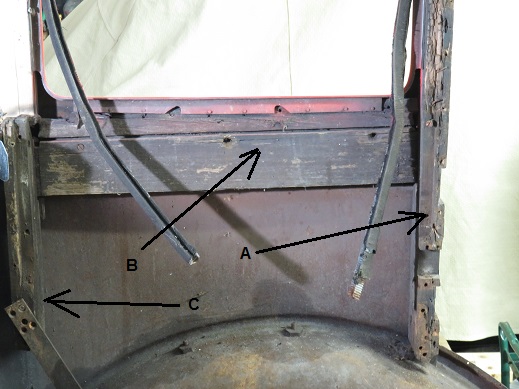 |
Item B is the two piece back board which is used to align
item C and the Hinge Pillar item A. I will make item B a one piece assembly and attach it to item C when I install Hinge Pillar. The metal frame was nailed into all three of these items but I will be using tiny Phillips screws to provide a stronger bond. Since these screws will not be visible after the window slides are in place no harm or foul. |
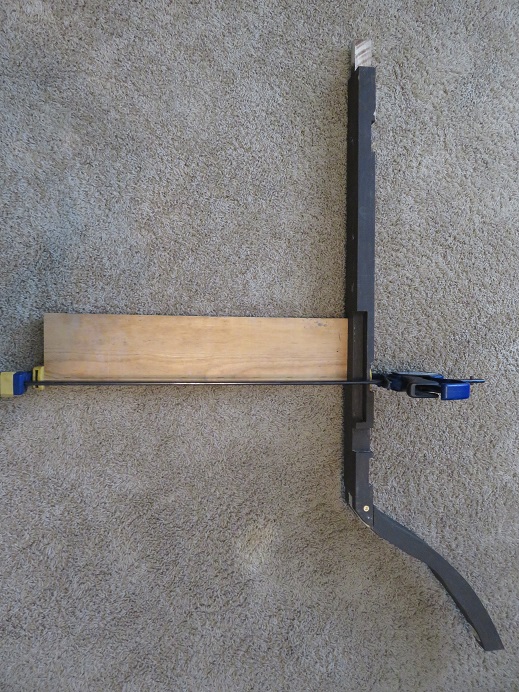 |
My main concern with creating the back window frame piece
was that the 21 inch spacing between the window frame was
maintained as accurately as possible. My back board is the same
length and width as the two piece assembly displayed in the
above picture labeled item B. To ensure the back board is aligned square to the Hinge Pillar I glued this board to the Hinge Pillar and drilled in quantity two 3.5" screws to provide a strong bond. Here again these Phillip screws can not be seen once the work is completed. |