Driver's Side Upper Roof Frame
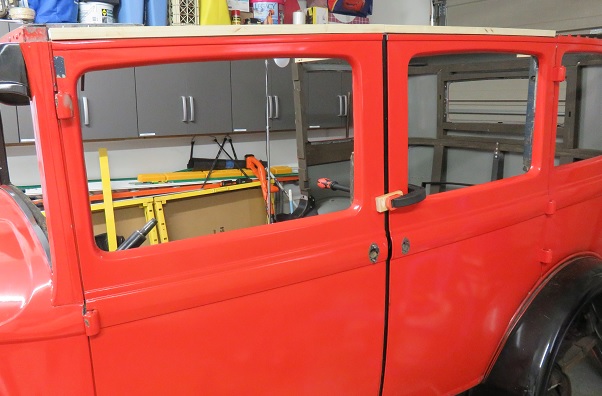
With the driver's side doors and center post installed I need to fabricate the top door frames and upper roof frame. This work will be especially tricky since there are few right angle surfaces to reference. Also the roof has a very slight curve both left to right and front to back. Since I have no original wood members to copy I will have to use the body curves and design, to create the new wood door frame and roof frame. Before I get started I will need to clean up the doors by removing any rotted wood which I will replace before moving on to the passenger side of the car. This is important since I am using these metal skins as quasi templates to create my needed wood frame members.
 |
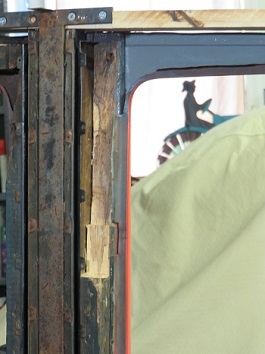
Wherever there was
badly rotten wood I cut the rot out in stepped sections to make it
easy to mortis in new replacement wood. With the help of glue and wood screws these new replacement pieces will add strength and support to the old door frames. Before I move to the passenger side I will finish the repair to these door frames. |
 |
After stripping out the rotted wood I sanded the inner door metal and painted all exposed metal surfaces with two coats of rustoleum oil base paint.
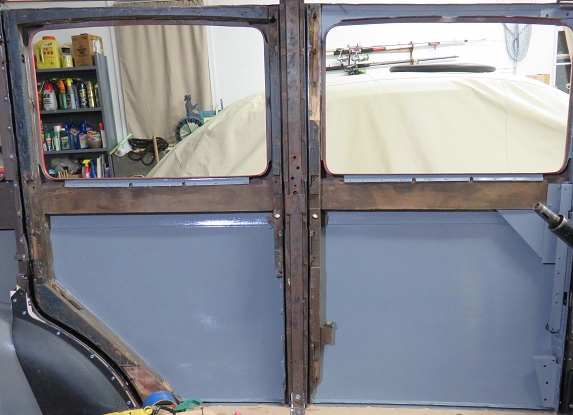
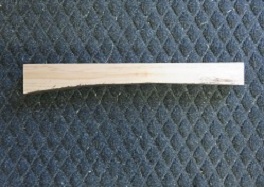
Even in the original construction the upper roof supports were made from sections of wood which created the slightly curved surfaces to finish the subtle design of the car's roof. I started by creating the upper driver's door frame using the metal door trim as a template. I used a length of 28 and 3/8" from the cowl frame to the center of the center door support. I used 3/4" thick hard wood with a maximum width of 2 and 3/4". The length of the rear is almost exactly the same +- 1/8 of an inch.
 |
Of course these pieces were sanded and
fitted to the existing metal supports. The front needed to
be mortised to accept the right angle brace and mortised to fit
the roof bracket. You can see three of the 4 screws which attach this wood to the cowl frame. I will cut the upper finished piece on an angle between the four screws. Doing this will allow me to mate the upper section of the front wood member which sits over the windshield hood. When this is done it will create a mortis joint which will join the front roof member with each of the sides. Maybe hard to envision at this point. |
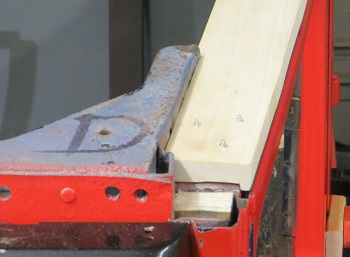
Once both the front and rear upper door frames were created and set in place I used the body as template to create the next 3/4" layer of wood. Below is a view of the way the driver's side roof member is shaping up.
 |
 |
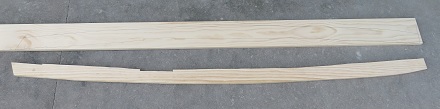
For the next layer of wood I will be using select pine. The reason I am using pine is because I will need to put a slight bend in this wood to mimic the slight curve of the roof from front to rear. This curve was naturally formed by the two separate door sections I created in reference to the rear metal skin.
I spent a great deal of time creating this wood section. All this work was basically accomplished over a period of a couple of days.
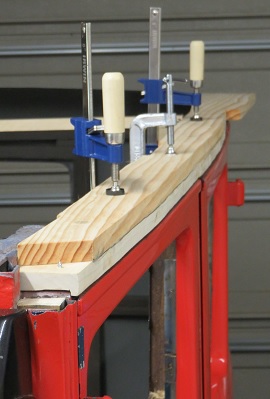 |
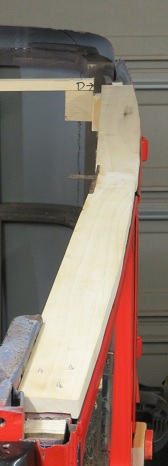
The left and right side members are the foundation for the car's roof so, many things needed to be considered while creating this next layer of wood.
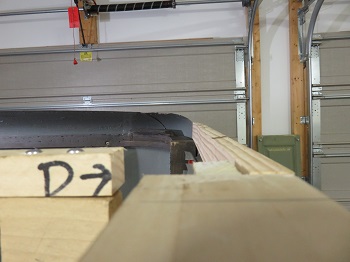
Below is the rough template that I will duplicate for the passenger side.
To create a permanent arc front to rear I moistened the wood piece before I screwed and clamped it into place. I allowed it to dry for 48 hours to permanently create the slight arc. |
The edges of the roof line need to be finished to a reasonably high degree of consistency. I ordered the following router bits from a woodworking supplier to help with this requirement:
-
Chamfer bit 45 degree 1" - Chamfer bit 45 degree 5/8" - Used for rough side and front form.
-
Round Over bit 1/2" radius - 1/4" shank - To soften curved edges on side and front.
-
Pattern Flush Trim 3/4" Lrg Dia, 1" - Used to cut accurate roof bows from a Masonite Template.
-
Flush Trim bit 1/2" Lrg Dia 1-1/4" - Used to square multiple layers of wood.
I continued with the driver's side roof line by creating the necessary wood pieces to finish the upper rear window frame. The upper rear window frame is created from three 3/4" thick hard woods.
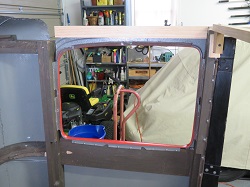 |
The first piece of wood was shaped to the exterior metal skin and squared to the internal wood frame. This piece was then accurately positioned and secured in place using the #4 1/2" Phillips screws instead of the conventional nails. |
 |
The second part of the rear window frame
top was created from two 3/4" thick hardwood pieces cut to form
and glued together. This last piece will be screwed and glued into place when I install the rear woodwork which will define the rear roof arc. |
The creation of this driver's side upper roof frame requires me to define exactly how every section will eventually go together. I believe more time will be spent defining the work required than the actual hours spent manufacturing the wood pieces that will define the roof lines. 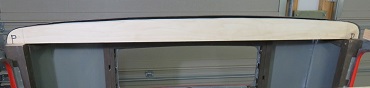 |
 |
At this point there are multiple areas being worked on at the same time. Some because there are dependencies and others because the finishing work can be put off to a later date. I'll try to keep these reports on topic even though my work efforts might have me jumping between door restoration and roof construction.