Roof Frame Continued (front & driver's side)
Before I move on to the completion of the driver's side frame I need to complete the work to the windshield area while the area was easily accessible.
-
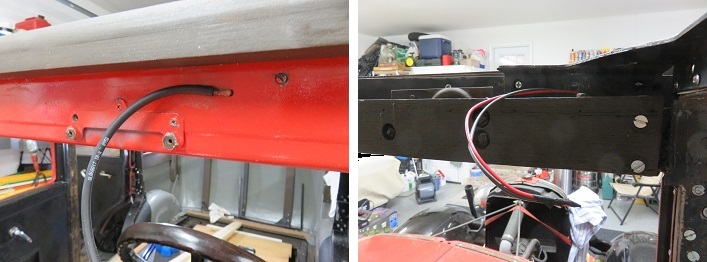
I reinstalled the vacuum line which runs up the driver's side hinge pillar. With the roof on it would be next to impossible to reinstall the tubing. I used the original old copper line because it is much more flexible than steel tubing.
-
Even though I am not ready to do wiring I ran a black and red #14 copper stranded wire from the dash area up the small channel between the window shield frame and the passenger side wooden hinge pillar. One wire can be used for the dome light and the other is a spare that could be used as a ground or a feed for anything else needed.
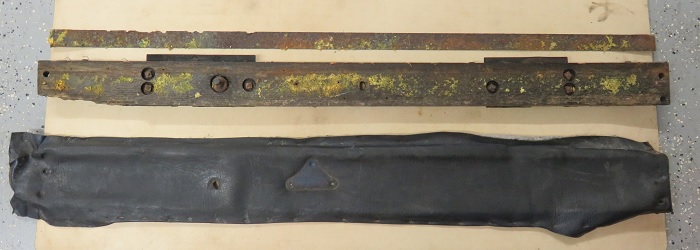
Below is my windshield regulator mechanism. When I removed the covering material I was surprised to see that the original mechanism had a metal strip completing the top edge. At first I thought that a prior repair was the reason for this piece but I think it was used to stiffen either the headliner material or the regulator cover material. The wood regulator frame looks bad in the picture but in spite of the broken corner the wood is in usable shape. I will trim the edge and repair the broken section.
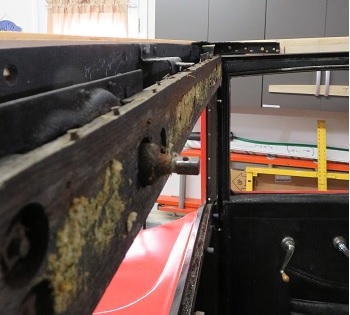
The roof bow directly over the windshield regulator attaches to the top metal angle brackets and sits on the center bracket just above the regulator assembly.
 |
In the picture on the left you can see the
old material tacks in the top of the regulator mechanism. I
believe the metal strip was there to allow the assembly to go as
high as possible to the ceiling by straddling the first roof bow.
This spot has the least amount of space between the headliner and
the roof material. The riser mechanism would straddle the front section of the bow and the metal strip would allow the regulator covering to finish the interior and blend into the headliner. I believe the headliner is seemed so that each seam may attach directly to each of the individual roof bows. Below is a picture of the repaired windshield regulator frame. |
Final construction of the Driver's side roof frame.
With the front roof frame section completed and the rear section defined I moved on to the final construction of the driver's side roof frame. The construction of these many roof sections now can be permanently glued and fastened together, sculpted, and painted.
With the passenger side created and defined I was able to check symmetry of the roof, front to back and left to right.

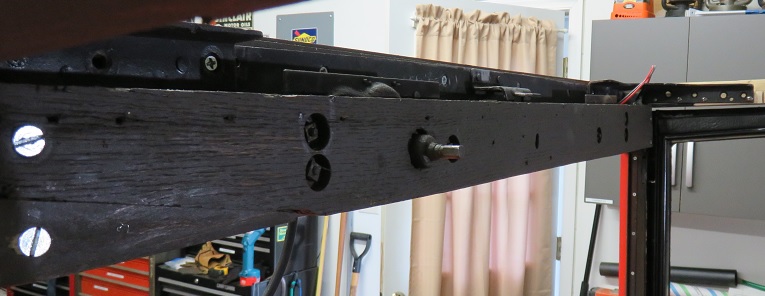
The driver's side roof frame was made from eight individual wood pieces. This includes the 3 wood sections which make up the upper rear window frame. With all the wood pieces positioned properly I glued the upper long bent roof section which provides an incredible amount of structural strength to the roof frame. This section is also positioned with a number of fastening and locating wood screws.
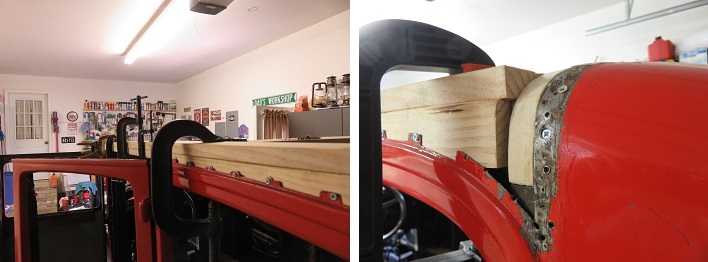
Once the glue was dried I started on the process of shaping the wood to flow with the lines of the car.
-
First I routed the roof line a couple of times with my one inch 45 degree chamfer bit. The purpose was to remove the bulk of the wood so that I can sculpt the curvature with my hand sander.
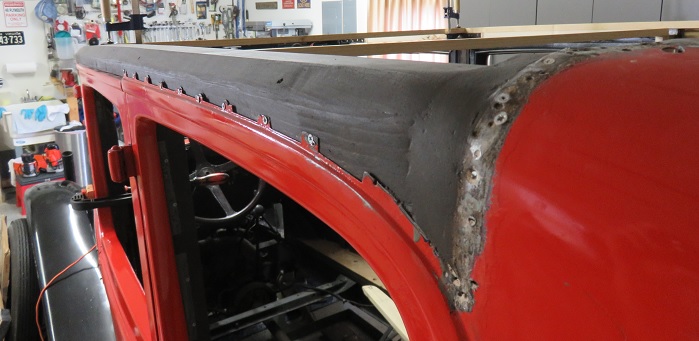
-
Next is the tedious job of sanding the roof line to produce the needed shape that once covered with the roof material will look pleasing to the eye. I have no actual specifications so I guess this is where technology turns into art.
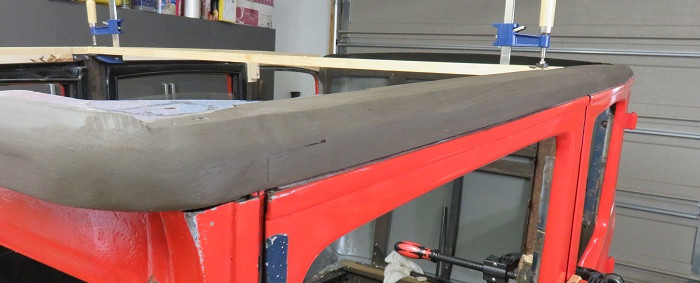
Below are the results of my labors:
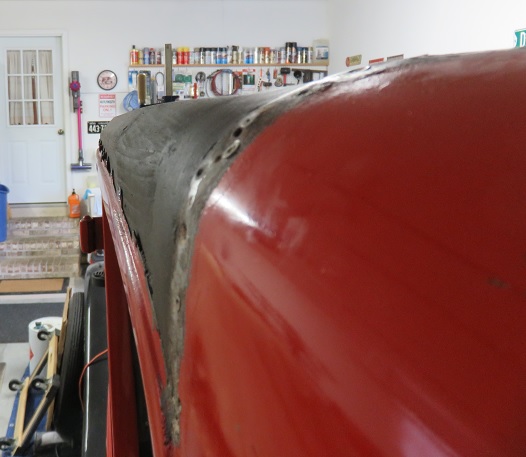
Please note: The bows will sit slightly higher than the top of the roof side frames. I may have to add some 1/4" roof lath between the bows at the roof ends to complete the side curve. This would be rounded with the sander once glued into place.
Once upholstered with roof material, installed upper door trim and rain channel; I think the roof will look pretty good. In any event much better than it was. Also a much stronger frame.