The Roof Bows Continued
I started work on fabricating the rear wood cross member which is positioned directly under the top rear metal skin. This is a very complex wood piece which mates the wood roof and the rear metal skin. The roof's rear molding also attaches to this assembly and needs to be water tight. After trying many methods it was clear that without an original wood member as a guide I would have to get creative. What is described below is my way of handling this problem based on the tools and resources available to me.
My main problem was getting a close fit to the arch of the rear skin. This involved an arc to the rear as well as a diminishing arc to the right and left. It's impossible to make a template for this many conditions so I decided to work on one angle at a time and assemble multiple pieces of wood to eventually be glued together to complete the needed roof member.
My first step was to create a solid wood area that mates up perfectly with the rear metal skin. I accomplished this by using two sections of lath to create the wood arch that would be fitted and merged into the support cross member. I used two pieces so that they would bend easily but when glued together would maintain the shape of the arc. To ensure that these wood laths didn't flatten out the arch created by the rear skin, I positioned a wood pole between the center of the arch and the floor of the car. I clamped the wood pieces into position and drilled a center and two end support bolt holes. Once everything was positioned perfectly with all screws in place I disassembled the woods and applied some glue to the lath board than reassembled the pieces on the car.
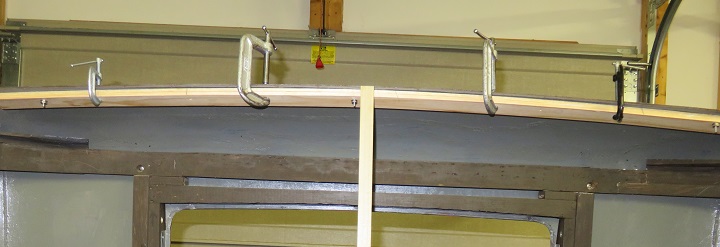
At this point the roof bows are not permanently attached. I had previously removed them so they could be painted while I worked on the front and rear roof members. No better time to accomplish this than while the glue dries.
 |
The first roof bow above the windshield
riser mechanism should be easy to fabricate. This piece is
mostly square and only has to be mortised to fit between the top two
metal corner brackets. The front windshield roof member
is already part of the roof frame so nothing to do there but attach
the lath boards. Once the glue is dry on the rear assembly I will start work on the remainder of the assembly. |
I used my original template to create a cross member that will mate with the arched wood lath. This was created to provide a 1/2 inch wood section that will accept fastening hardware from the roof covering. Once the cross member was fitted and aligned with the rear skin I cut the arch of the cross member 1/4 inch smaller than the actual arch of the metal skin. This will allow the 1/4 inch roof boards to install completely flush with the metal skin. I then fitted the template wood to attach to the rear of the cross member and fit flush with the rear metal skin. This is very hard to describe so please see the picture below. The pieces will be glued and fastened together in the final assembly.
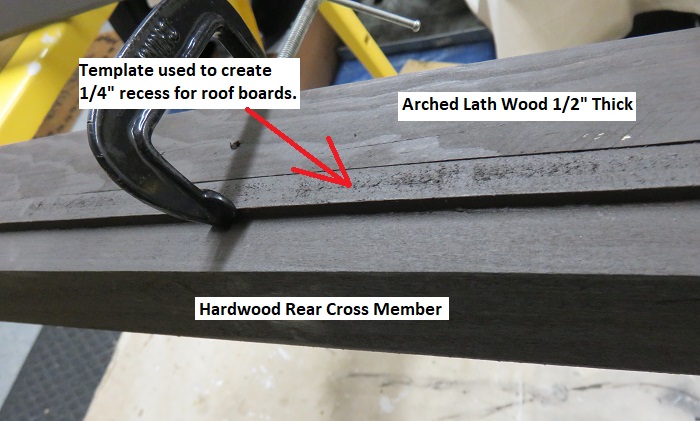
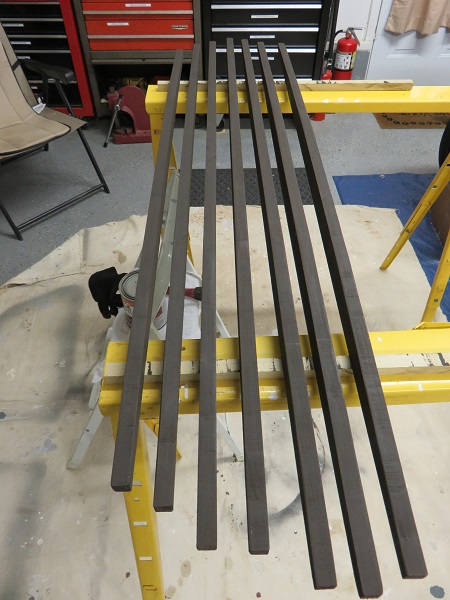
This complex cross member was made from 4 individual pieces of wood and glued together to complete the rear roof section. Once installed it will be supported and attached to the roof frame and rear metal skin.
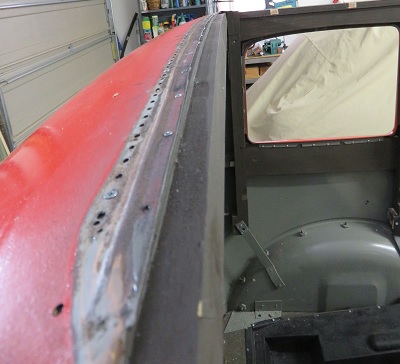
I installed the bentwood lath first using Black Silicone Pematex adhesive to seal the wood to the metal roof skin. The wood is held into place by 5 machine screws (632 flat head) with washer, lock washer, and additional nut to keep the screws from loosening from vibration. Once in place I positioned the hardwood cross member and drilled for the upper roof wood screws. Originally nails were used for this purpose but as you know from previous work I am using #4 flat head wood screws.
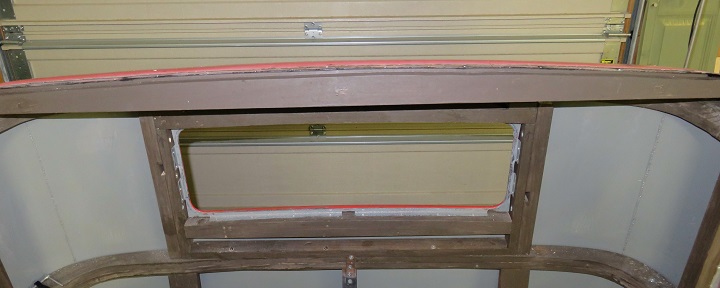
Below is a picture looking up from the floor. The top of the window frame is in the top section of the picture.
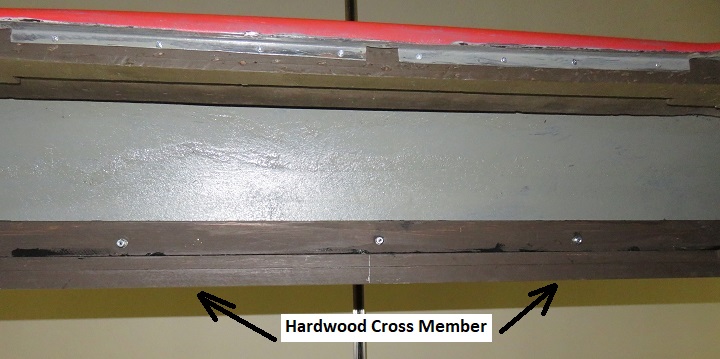
The rear roof member also attaches to the rear side window frame.
 |
At this point I have a well-defined 1/4" deep recess to attach
the rear roof boards flush to the rear metal skin. Also
this roof section provides adequate wood backing to attach the rear
roof molding.
|