The Roof Lath & Initial Prep for Paint.
In order to get the car ready for paint I intend to complete all the exterior body work prior to installing the motor or any other items like wiring/windows, etc. This means that I will be delivering the body shell to the paint shop as a rolling chaise. I will need to install the dashboard and steering wheel to allow for easy positioning of the car in transit and at the paint shop. I will be leaving a couple of lath boards off to allow for the installation of the steering column switch assembly. Not installing the switch assembly will allow for easy removal of the wooden steering wheel during the paint process. The painter will paint the dash while installed in the car.
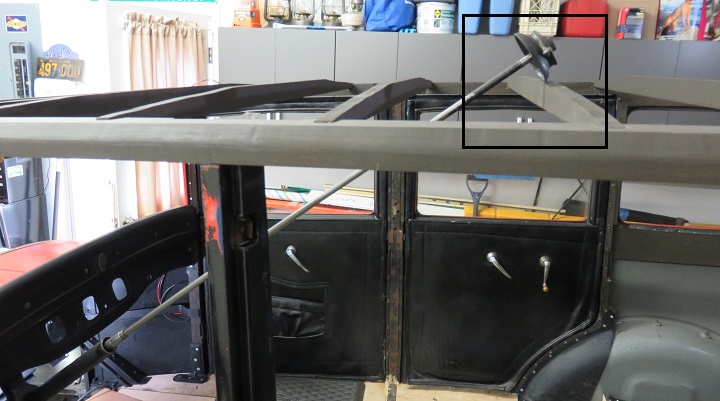
As you can see below the steering wheel switch assembly can be installed with out hitting the roof bows. I will leave a couple of lath boards off to allow for the final installation of the switch assembly prior to installing the finished roof material or interior headliner.
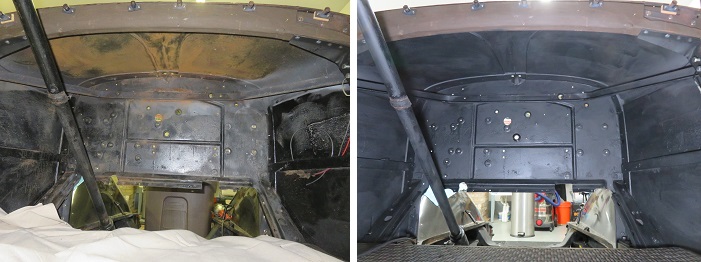
During the colder days of January and February I worked on odds and ends. During that period I completed installing the bottom steel bracket supports for the dash which completed the hardware installation. Since the floor has been created I removed the dash and cleaned up the area behind the dash and painted with a coat of flat black.
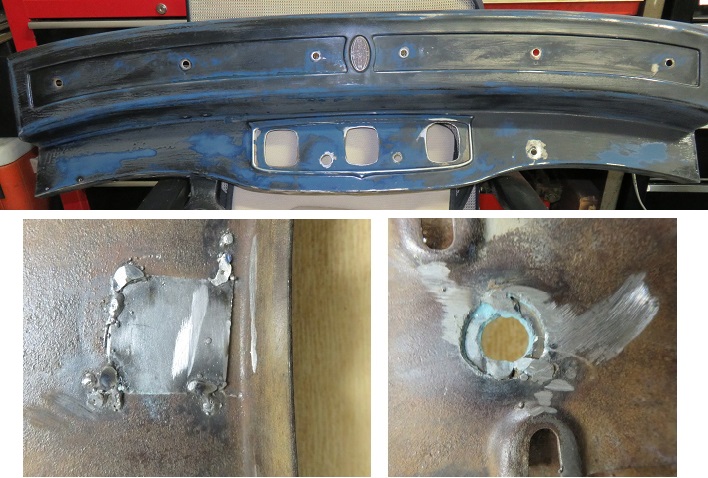
After the cowl area was cleaned and painted I sanded the dash and proceeded to repair some holes that were added by previous owners. On the right side of the dash a hole was made for a cable control because one of the existing holes for cable controls were drilled out to support a make shift ignition switch. All this was removed and I tack welded in a patch for the additional hole and fixed the elongated cable hole by welding in a washer with the correct hole size. See below.
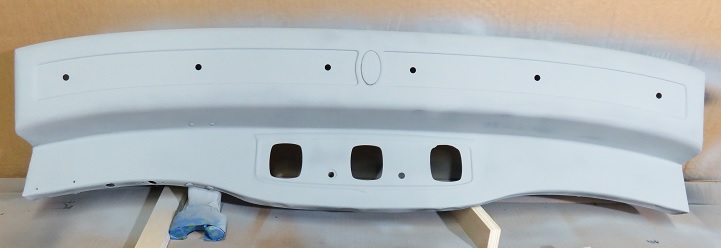
I took advantage of some low 70 degree weather and painted the dash with gray primer. The picture below was after some wet sanding of multiple coats. I added a finish coat of black which was sanded prior to installing the dash back into the car.
I will need to have the dash installed prior to finish paint so that it can support the steering column. When the time comes to move the car it will be necessary to use the steering assembly for positioning this motorless, and brakeless vehicle. I'm afraid that without the added support of the dash the steering column might be damaged when moving the car.
Completing the roof:
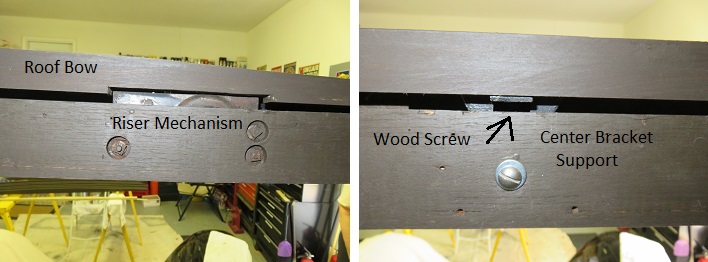
With the rear roof bow (cross member) completed all I need to do now is create the bow which sits above the windshield riser mechanism. Once this is accomplished I will be able to install the bows permanently and than install the roof lath. Of course the finish roof material will be installed after finish paint.
The bow was created using the same template as the other bows. The arc of the corner brackets was exactly the same as the other 7 bows and the width was also consistent with the others. This was good news in that this consistency assured me that my original template was correct and consistent front to back.

This bow is throw bolted to the cowl corner brackets. There is also a center metal support which supports the Windshield riser mechanism and provides center support for the roof bow. I believe the center machine bolt is also used to hold the rearview mirror in position.
Once this section was completed I permanently installed all the roof bows and cut and stained the full length roof lath. Installation of the full length lath was pretty straight forward. I used 1/4" thick 1.5" wide board. While the stained lath was drying I fabricated a roof panel to support the dome light. This installs between the #5 & #6 bows counting from the first bow above the windshield riser front. As mentioned earlier, two lath boards were not installed to make it possible to easily install the steering wheel switch rod assembly.
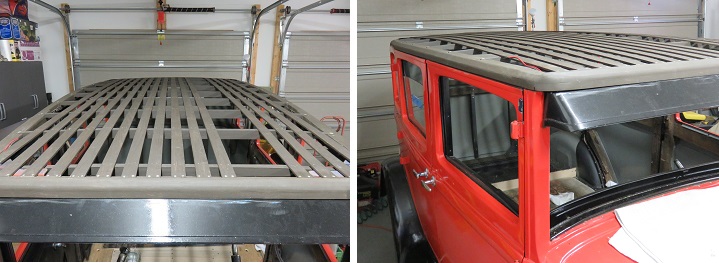
I still need to add the short lath boards but for now things are looking real nice.