Prep for Paint - Door Repairs.
My next step toward paint is to get all my door frames and door trim repaired and in place before the car goes out to the paint shop. Of course I will leave out the window mechanisms and glass which will be installed after the body paint is completed. All inner wood frames and outer door trim will be repaired with door locking mechanisms installed and operational. Door hardware will be masked prior to paint. Within this module I will be jumping from one door to another because in repairing the inner wood frame pieces, they sometimes have a dependency on other wood sections to be created first. In an effort to keep the work moving along I will be dividing my time across multiple doors at the same time. Since most of this is somewhat repetitious what I will show in this section is the highlights of the most interesting repair components.
The Driver's side front and rear doors had already been stripped of hardware and the metal skin cleaned and painted. If you remember when I stripped and prepped these doors I cut out the rotten wood and stepped it in order to adjoin new pieces with modified lap joints. The first section I attacked was the top driver's side door frame. The entire section was gone and had to be fabricated.
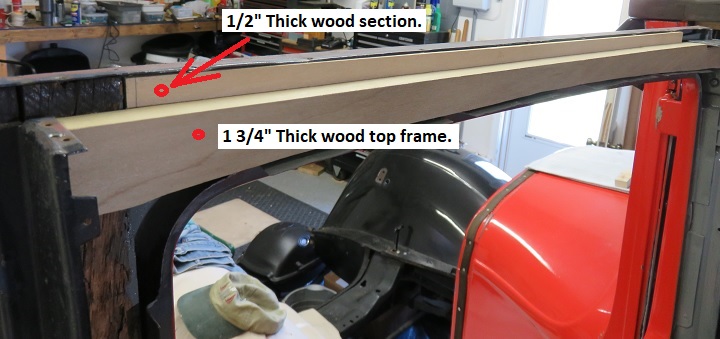
I started in the usual way by creating a template using the door skins to create the needed window frame arc. From this template I created the 4 pieces of wood needed to make this top door frame which had a total width of 2 and 1/4 inches.
-
Top stepped section 1/2 inch thick which is the same thickness as the original wood.
-
The top frame section I made from two pieces of hardwood 3/4" thick with a third section of 1/4" thick plywood to space the frame section exactly 1 & 3/4" in width. These three pieces of wood were glued together and stained to protect the wood from future decay.
-
The top frame section will be glued to the top stepped section and fastened to the side frame and right side metal bracket. I used body nails in the top frame just like the original construction.
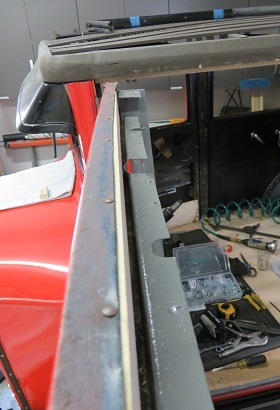 |
The picture to the left shows only the 1/2"
thick stepped section fastened to the steel skins using period body
nails. The picture below shows the top wood frame section placed into the door. This section will be glued to the stepped section and attached on the left by the left side door skin and screwed into the left side wood frame. The right side is attached to the 'L' bracket from the right side metal door frame. This attachment method is only available on the two front doors attached to the cowl hinges.
|
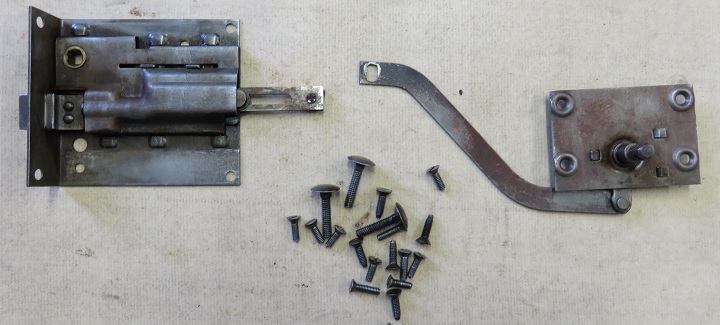
So far it looks like I will be able to use the original center boards which hold the window and door locking hardware. Although at first glance they looked ugly but once sanded and re-stained, they cleaned up very nicely These pieces are very complex to recreate especially the curved arch which helps guide the window regulator.
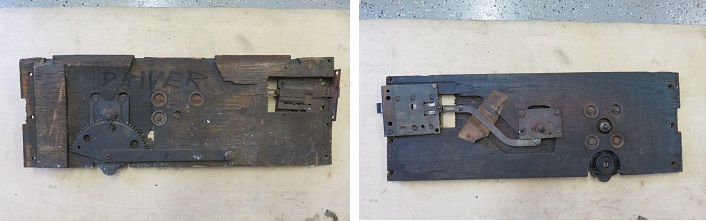
Once the hardware was removed, cleaned and lubricated, the wood sections were sanded and re-stained to protect against further decay.
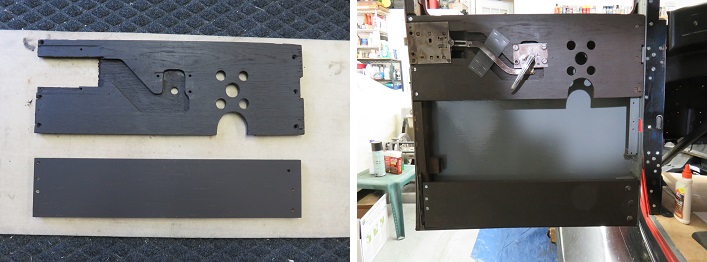
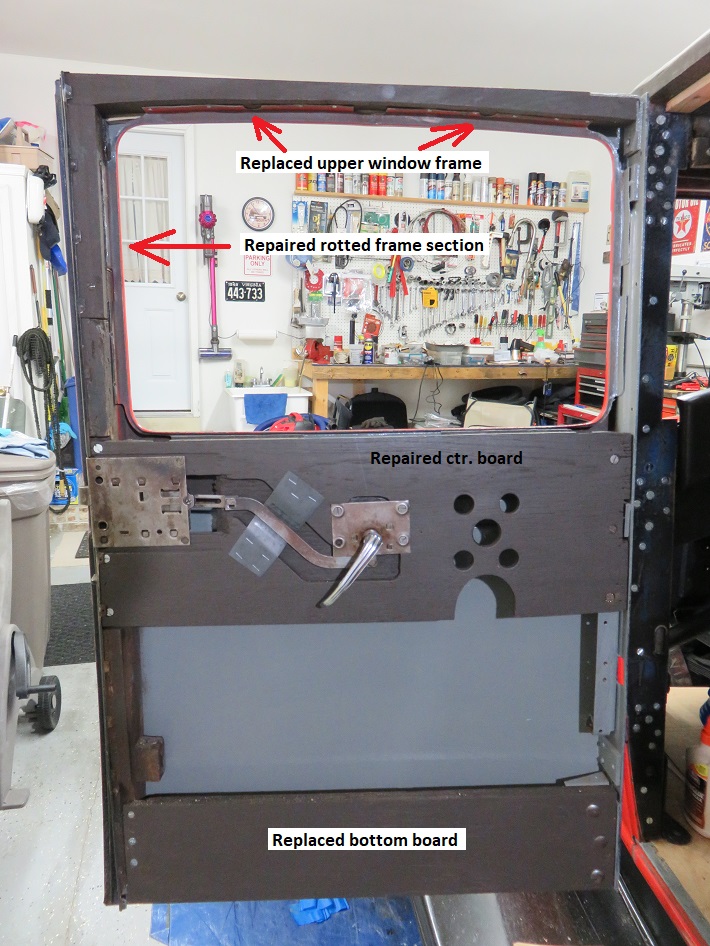
Below is a picture of the finished driver's side center board along with the bottom board that I cut from 3/4" hardwood.
As stated earlier, the window regulators and appropriate hardware & glass will be installed after the finish paint.
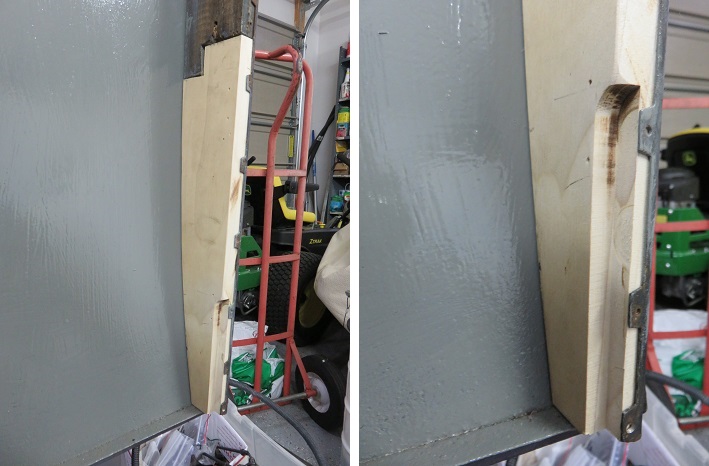
Below is an example of how I replaced the rotten wood door sections. As stated earlier I had previously removed the rotted door frame wood. Using a Dremel tool, I created a modified lap joint to which I could attach new frame hardwood. I duplicated the needed curved area by using the square door metal trim as a point of reference and clamped a piece of hardwood to the door and used the exterior door body to draw the needed curve. I did have to block the wood to sit square on the stepped metal door frame. Below is the result of this effort.
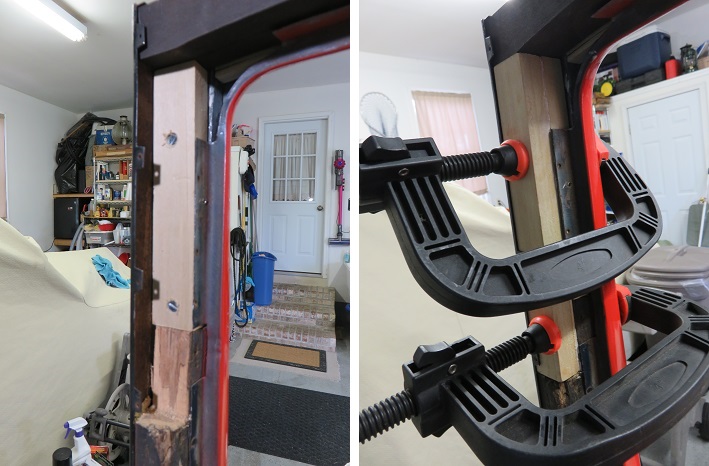
Below are examples of a repair on the driver side door's top window frame. The original wood was stepped so that in the picture on the left the first block is attached to the existing rear 1/2" thick original door frame. This first block is both screwed and glued to what was salvaged from the original frame.
The picture on the right shows a longer section of newly added frame which is glued to the first section I installed. It will be screwed into place by a screw through the top frame and a screw through the bottom of the modified lap joint, roughly where the bottom clamp is located. This multi-piece assembly once dried, will become a strong solid repaired door frame.
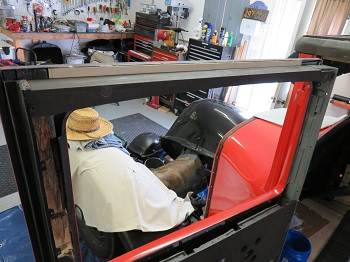
The door frame repair will be further strengthened when the window flange screws are installed along with the nails that fasten the metal door skin to the wood frame. The picture below shows the finished Driver's side door.
Only three more doors to go. The good news is that I think this one was in the worst shape.