Reassembly - Vacuum Fuel Pump
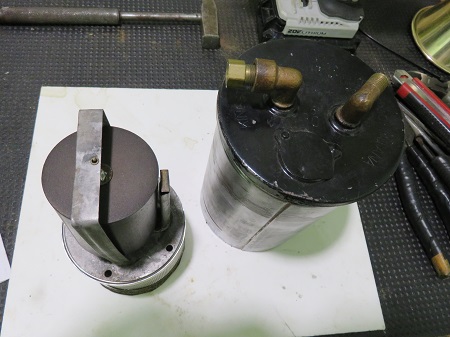
While waiting for my speedometer cable I started work on the Kingston Vacuum pump. Thanks to Russ T. Fender I had some extra parts that I am sure I will be able to get this working, I hope. I cleaned everything in the ultrasonic cleaner. Between the two Vacuum pumps I have I was able to get one top unit repaired. See Below.
|
The NITROPHYL® Float Material I purchased from Restoration Supply Company. It is 2" by 3" long. I cut it down to 2.5" long. The normal width of the float is 1.5" but the 2" float works OK. I shortened the 3 inch length because of the added width of the new material. Hopefully it will maintain the proper fuel dump to the lower fuel chamber. Everything seems to function as expected. If this pump turns out to be unreliable the electric fuel pump will always be an available option. |
 |
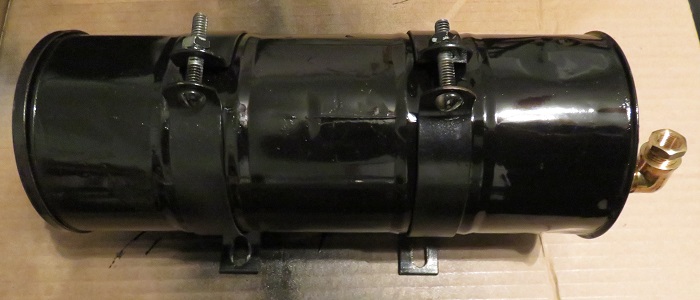
With the top unit apparently ready to go I worked on the leaky canister. I soldered all the known areas in need of repair and then, I plugged the bottom hole and filled the canister with water. I still had a spot that was leaking so I emptied the canister, dried it out and soldered the remaining leaks. To stress test the canister I filled it with parts cleaner solvent and let it sit overnight in a vice with a paper towel below it. No leaks the next day so looking good.
I cleaned it once again and painted it black. After a day in the warm house to dry, I completed the assembly of the pump. I ordered a fuel shutoff valve and other stuff from Restoration Supply. When I get the parts I will install the pump in the car. I feel pretty confident that it might work. It's such a simple device I can't see it not working. If all this fails I still have my electric pump to go back to.
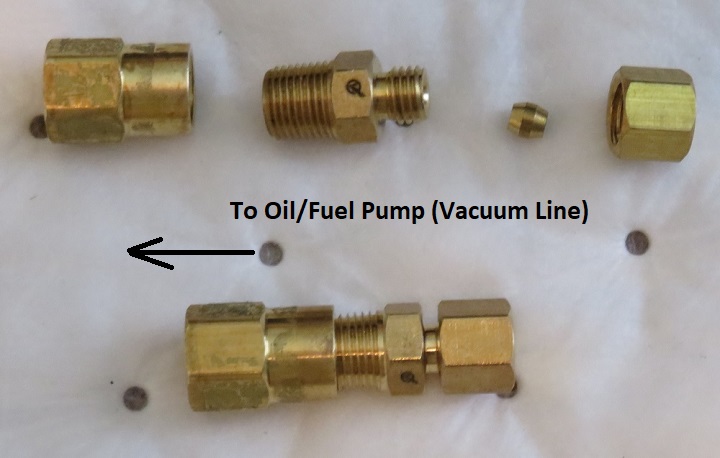
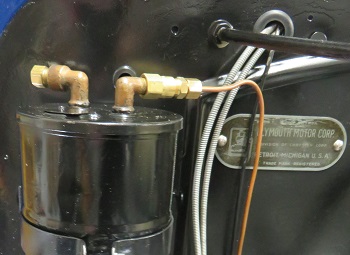
To my knowledge the fittings for the 1/8" soft copper tubing which match the old oil pump are obsolete. I believe it is important to maintain the 1/8" copper tubing so in order to accomplish this I did the following. The 3/16 inverted flair side of the 1/8 pt converter screws onto the old female tubing fitting on the oil/vacuum pump. The flair side is a machine thread not a pipe thread and needs to be bottomed out and hand tightened. Teflon tape may be used if the threads are in poor shape. Once this is accomplished you will be able to install a 1/8 pt to 1/8 OD copper tubing compression fitting. See picture below for clarification.
| The picture on the right shows the installation of the 1/8 soft copper tubing to the oil pump using the conversion setup I detailed above. |
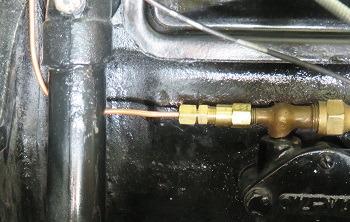 |
| The picture on the right shows the same setup used to convert the Vacuum fuel pump fitting. |
 |
After I successfully installed the vacuum line, I plumed in the rest of the fuel lines to the carburetor. I installed the vintage sediment bowl as well as the gas line shutoff valve. See picture below.
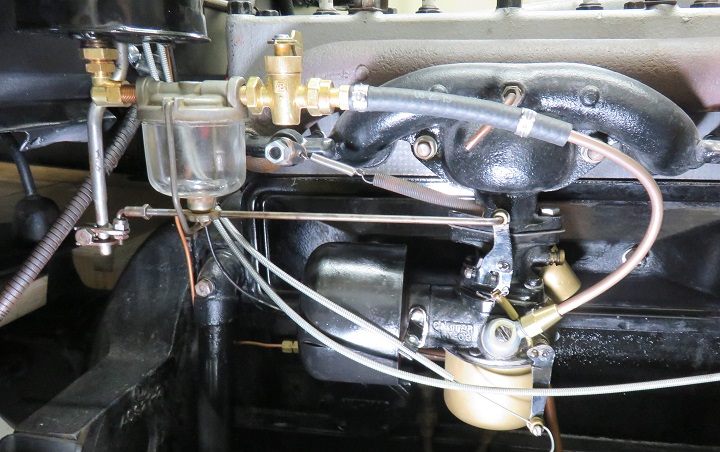
Rather then hard pipe the Vacuum pump to the carburetor I used a small piece of 1/4" rubber fuel line to absorb vibration from the motor. Since the copper/nickel tubing is a little less flexible then actual copper tubing this minor change seemed appropriate to me.
I primed the fuel pump by first feeding in 8 oz. of gas. Nothing filtered down to the glass bowl. I added another 8 oz. of gas and fuel ran quickly into the glass bowel and then to the carburetor. I closed the shutoff valve and added another 4 oz. of gas. There should be about 16 oz. of gas remaining in the fuel pump with the valve shut. The additional 4 oz should compensate for the gas that flowed into the glass bowel and carburetor.
Not ready to fire the motor up at the moment so I left paper towels on the gravel guard to detect any leaks. So far so good. No leaks.