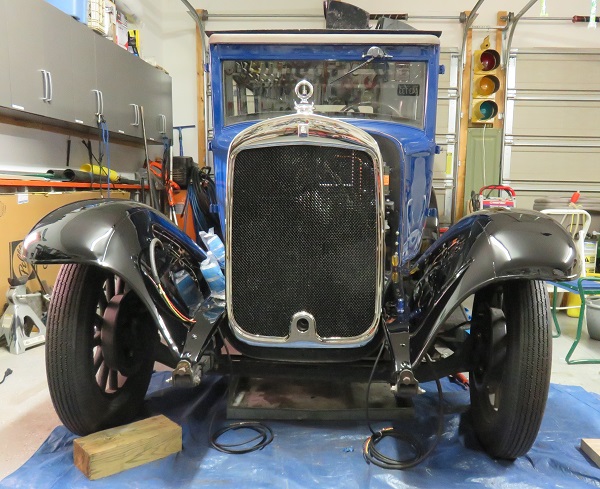
Front Fenders/Running Board
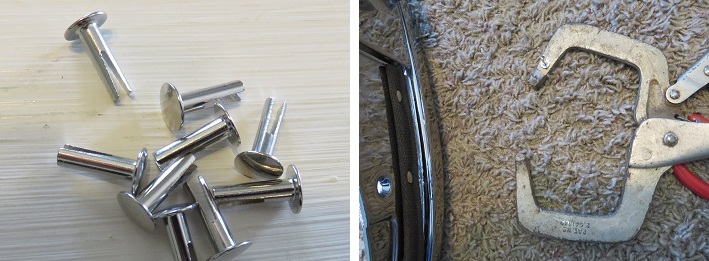
Before installing the passenger side front fender I needed to reattach the hood latches. Originally they were riveted so I used threaded rivets to reinstall. Threaded rivets look like rivets on the finish side but are attached with normal machine nuts. The threaded head is knurled under the finished round head to bite into the surface material and not turn when tightening the machine nut.
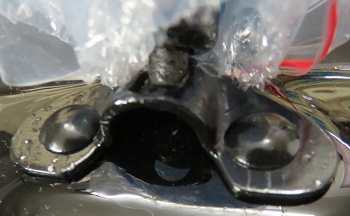 |
I used a 10-32 round head rivets 5/8"
length. These are stainless steel so the heads needed to be
painted black. Of course once the lock washer and nut were installed the remaining screw shaft was cut/ground flat to the nut. I wrapped the hood latches with bubble wrap and covered in a small plastic bag. This will protect the newly painted fender during the installation process. |
 |
I installed 1/16" thick 2" wide rubber between the frame and the fender. I used my punch kit to cut holes in the rubber to allow for the mounting screws and provide a buffer spacing for the radiator cross member rivets.
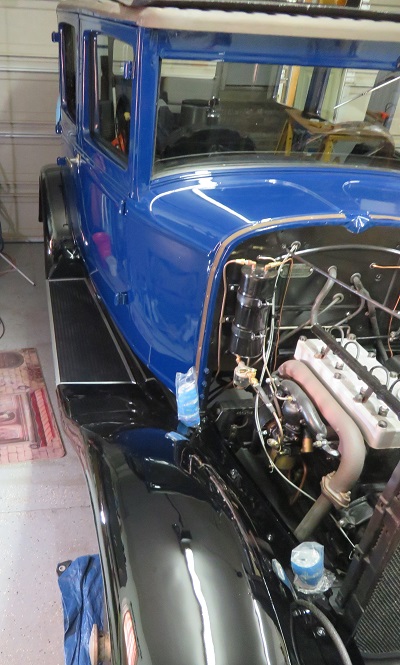
Installing the fender went better than expected. By leaving the rear support attached to the car and removing the front support with the fender, aligned the fender back in the same position it was when I removed it. |

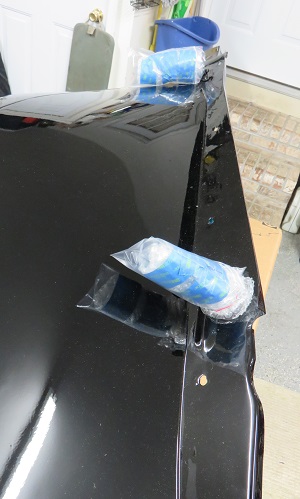
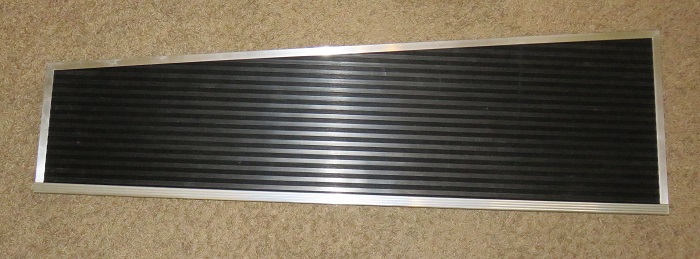
With this done I moved on to the passenger side running board. I made the running boards a number of years ago but they needed to be updated with the correct rubber top coat. I also replaced the front aluminum edge to be closer to the original. It looks good but maybe some day I will find a good set of useable running board trim pieces.
 |
In order to get everything to mate up
properly I had to loosen all the mounting screws on the front
fender. Once everything pulled together I retighten all the fender mounting screws. Standard assembly technique. I won't tighten the driver's side until everything is in position. Lots to do so I will keep chipping away. Weather is supposed to turn cold so I might install more passenger side glass. I'm not able to use contact cement or paint small parts if the temperatures drops below freezing. Now that the passenger side front fender is done I need to install the radiator shroud before proceeding. Like the running board all these metal pieces need to mate up with each other so it will be necessary to mount everything in the front clip and then pull it all together including the headlamp bar and the sheet metal under the radiator. |
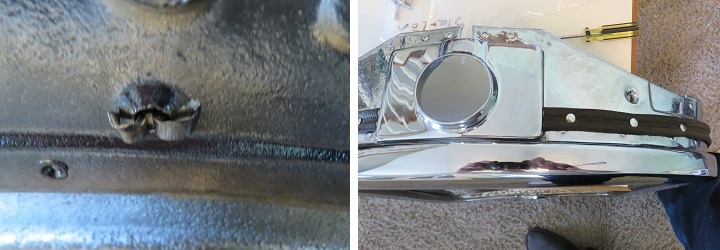
My radiator surround has already been chromed so the first step is to mount the hood lace on the radiator surround. I used split rivets to attach the hood lace. There is a tool that you can use to spread the ends of the rivets. Since I didn't have the tool and I only need to do 20 of these rivets I used a screwdriver to spread the ends then I twisted the legs with a long needle nose plier. I then used a Vise-grip C clamp to tension the rivets.
This worked out well. The vise grip pushed the rivet in while at the same time pushing the curled ends down into the surround. The effort was tedious but the results were more than acceptable.
I needed to loosen the two large radiator bottom nuts to allow everything to center properly. The end result is that my pile of parts is starting to look like a car once again. I still have a lot of work on the drivers side of the car. I need to redo the running board and align everything including the light bar and the sheet metal below the radiator. For now everything is looking good.