The Interior / Headliner
I ordered automobile headliner material from a commercial source. I thought I was just buying material but found that what I purchased came with a soft foam backing. The modern headliner is usually glued onto a Styrofoam roof form. I really can't send it back and since it compresses easily I decide to give it a try. The material itself is extremely durable and strong. If it doesn't come out OK I will just have to start over. The cost was inexpensive and came in a 60" width, 3/16" thick, and sold by the yard. I purchased enough to do the headliner and the interior of the car. I am using my original seats but will replace the matting with new extra firm foam.
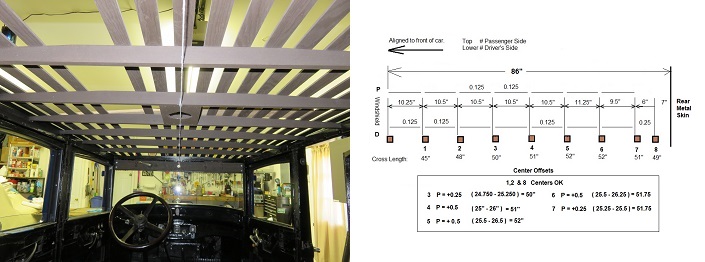
My wife and I spent an entire day measuring all aspects of the headliner. Each wooden bow, its relative position, and length. We created the information sheet in the picture above. These dimensions are only applicable to my car because I reconstructed the roof. Even though I used an original 1929 Plymouth wood roof frame as a guide, I can't guarantee that dimensionally the matrix of my roof would be usable for an original wood framed car. What we needed the matrix for is to position bias tape to be sewn onto the back of the headliner material. I want the sewn seam to be positioned on the front edge of each bow. I will use this bias tape to attach the headliner to each of the wooden bows.
Since it is an imperfect world, we checked the curved edges of the interior car's frame. It turns out that the passenger side of the car is slightly off center by 5/8". Bow 1 & 2 are dead center with no offset. The offset starts at Bow 3 with 1/8" gradually increasing to 5/8" at bow 5 then decreasing back to 1/8" at bow 7 and dead even again at bow 8. This exercise was important to do since we can't measure from any other place then the cars centerline. The picture above and to the left shows my car's centerline. I marked each bow both front and back.
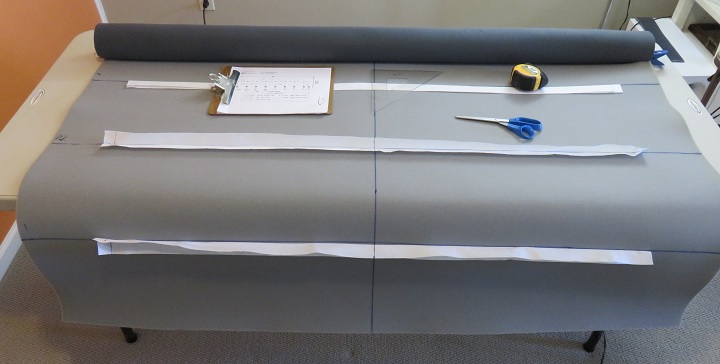
As you can see from the picture above we drew the center line on the back of the headliner material. We then used a four foot T-square to position the bow lines on the headliner. We then cut the bias material to length, marked the center of the material and pinned it to the headliner for sewing. Since the headliner's surface material is facing down the left side of the picture is the passenger side of the car. We then added the offset dimension to the passenger side of the center line. (Bow 3 = 1/8" - Bow 4 = 1/2" - Bow 5 = 5/8" - Bow 6 = 1/2" - Bow 7 = 1/8")
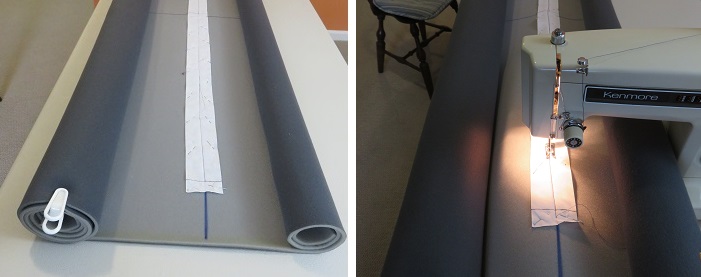
Sewing the headliner with the wife's sewing machine was challenging. We needed to roll the material around broomsticks in order to move this large material through the machine. Keeping the stich line straight was a very hard task. Instead of controlling the material at the point being sewn we needed to feed the whole piece through the machine making adjustments by moving the rolled up ends. Sometimes you need to be a little creative and use what you have to get the job done. Working together we finished all 8 sections over a period of 2 afternoons.
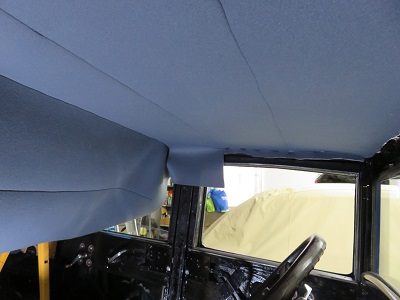
Installing the headliner was tedious work. Attention to detail is most important so this also became a multiday process. Doing something like this for the first time is probably why the work went so slowly. We put a four foot saw horse in the back of the car to hold the rear section of the headliner close to the roof while we attacked the front section.
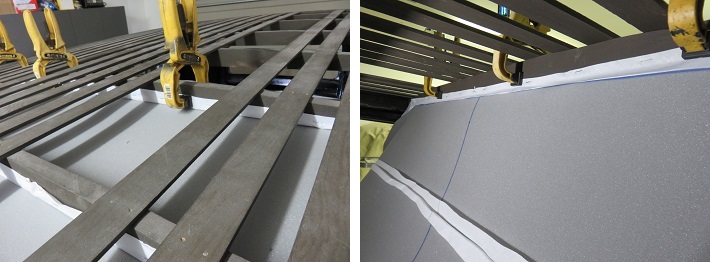
While my wife positioned the headliner in place from inside the car I was able to work from the exterior roof area to align the center mark on the headliner with the center marks on the wood bows. I clamped the bias tape in the proper position and stapled the front side of the bias tape from the roof of the car. The picture above and to the left shows how this was accomplished. The picture above and to the right shows how we stapled the rear side of the bias tape which added tension to the paneled section and took up any slack between the panels. This was accomplished inside the car.
 |
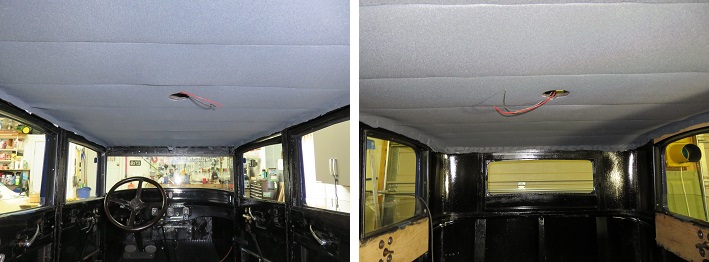
After finishing the first two bows I stapled
the material to the side and front window area. I removed the windshield riser assembly earlier. This will also be covered but that is a separate item and we will cover that with the top trim and door panels. After attaching the sides and front, the headliner really took shape and started looking really nice. The material was now tight and firm. We were able to set the third bow in place before calling it quits for the day. |
We installed the remainder of the headliner. With each bow the tasked seemed easier and easier. The pictures below are the result of our efforts.
With the headliner completed I will start on the rest of the interior. I still need to find a shop that can replace the exterior roof surface. I want the exterior roof to be leak free so I will search for a professional shop familiar with antique vehicles.