Headliner / Windshield Riser
Tying up loose ends with the headliner install. Ordered black piping to trim the doors and precut some of the trim boards that I will be using to finish the small side areas above the doors.
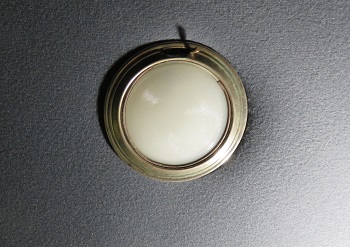 |
I installed the Dome Light. I had to
repair the switch mechanism which had seen better days. The
switch works fine now but I still wired the dome light to the
ignition switch. This way I do not have to worry about the
dome light running down the battery because it was left on or came
on while driving. It is basically on the same circuit as my
dash lights. Unless the key is in the on position these lights
do not work. The lights were not wired like this from the factory. They were originally wired to work without the ignition key in the on position. |
I will be using my old seats which will add some patina to the interior project. For the most part I need to remove the stuffing behind the upholstery and put in some extra firm foam. Once the frames are repaired the coverings themselves are in good shape except for the driver's seat. These seats although not original are very dated maybe from a restoration in the late 50's or early 60's. So they provide a needed hint of age amid all the shiny paint and chrome. Anyway if needed in the future they can be taken out and reupholstered. After 4 years of throwing money at this car the well is running dry. A professional interior is just not in the cards.
-
Please Note: The work that follows is just how I am handling the aspects of redoing the interior of my old car. It is not represented to be a guide or even a good way to do this work. It is just a view of what I have done.
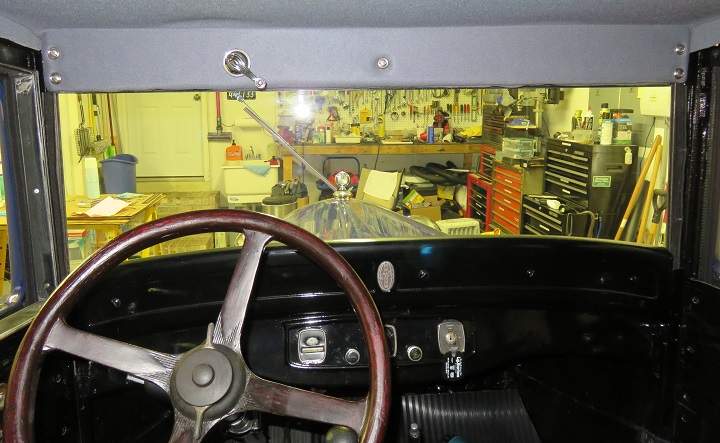
While I am waiting for the door piping I decided to finish the area around the windshield riser.
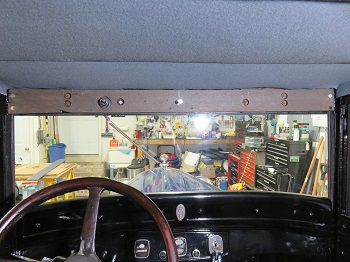 |
The wood portion sits directly below the
first bow. It is roughly 3 inches wide but the headliner
needs to be higher than this in order for the windshield crank to
have enough room to turn freely. Originally the headliner was attached to the bottom of the first bow. In order to tension the headliner and increase the width of the finished area a steel strip 1.25 inches wide was nailed to the top of the wood riser assembly. This laid across the gap between the bow and the riser assembly and tensioned the headliner while at the same time increasing the front surface width by approximately 3 quarters of an inch. |
Rather than use a steel strip I used a cut section of backing board to accomplish the same affect. Since my car had been restored in the past, I wasn't quite sure if there was an additional piece like this, but certainly without it, the handle's escutcheon plate would hang way to loose.

I cut some door board exactly the same size as the window riser except I added 3/4 of an inch to the top edge to bring the overall width of the windshield riser assembly from 3" to 3 3/4 inches. After I cut all the appropriate holes I glued material to the front surface. When it dried, I glued the remaining material to the back of the board. This created a nice straight edge to push against the headliner.

I aligned the riser assembly and installed the top screws leaving the bottom screws out. I also installed a long screw in the center hole and I used this screw as a point to position the surface board and keep it in place while I work on the end screws.
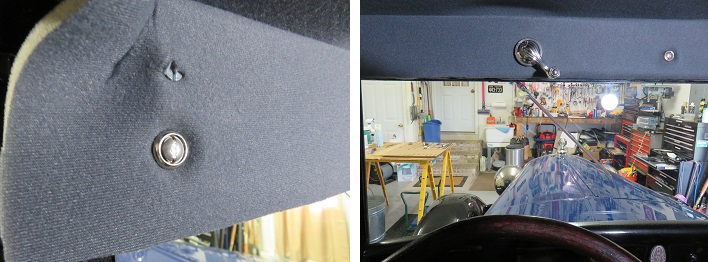
I pushed up the ends of the back board until they were even with the bottom of the riser assembly. I installed the bottom screws and removed the top screws since the bottom screws were holding the riser in place. I removed the long center screw and installed and tightened the center screw. Before installing the top screws I installed the escutcheon plate and crank handle.
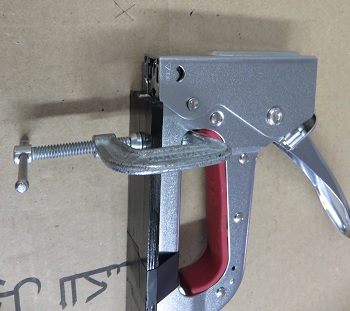 |
Once everything was in its proper place I
loosened one side at a time and with a small flat steel putty knife
I forced the material behind the riser assembly then tightened the
screws. All that was left now was to staple the material to the bottom of the windshield assembly. Since stapling in different places has a tendency to bunch the finish line. I clamped a piece of lath board to the bottom of my stapler to position the staple as close to the back edge as possible. The guide will ensure that each staple is properly positioned. The stapler I am using is a little smaller than the average utility gun. It is a Arrow JT27 using 1/4" JT21 staples. |
Even though the bottom edge came out acceptable. I think I will install a 1/2" aluminum trim piece to finish off the bottom rear edge. Probably paint the aluminum black. It would be virtually unnoticeable both inside and out but I think it would make for a cleaner rear bottom trim. I guess now I need to clean up the review mirror bracket and paint it black. I have new glass for it also.