Interior / Rear Passenger Area
With the headliner in place it was time to tackle the interior walls and doors.
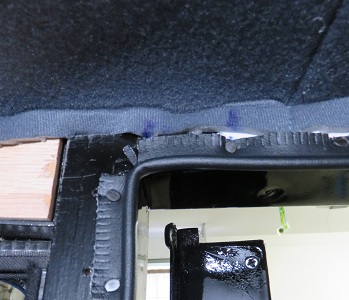 |
In order to finish the headliner trim above
the doors I first needed to install piping around the door openings.
The 1/4" piping provides a nice finished look and is not as large as
windlace from the 40's to 60's. Since I am using the headliner material to finish off all surfaces, I need to adjust the size of the door board I am using to facilitate a padded edge vs. a fabric edge. This isn't that big of a deal because you would normally pad under standard material. This headliner material comes with its own padding. The edge above the door frame is 1.25 inches wide so I adjusted the diameter to 1 inch. I tried to create a piece long enough to go across both doors but found this to be impractical. |
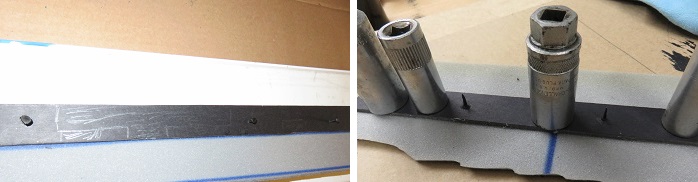
I cut strips and marked the board to avoid putting tacks where there was metal. I needed to avoid the steel tabs which secures the metal skins to the wood frame. I then positioned tacks through the front side of the board to allow for mounting the pieces to the wood framing. I applied spray glue to the front side of the board and placed it atop a cut piece of material. The picture above and to the right shows the board with tacks showing. I used the sockets to provide weight to the board in order to get a good seal. I am using Napa 4032 Super Trim Adhesive.
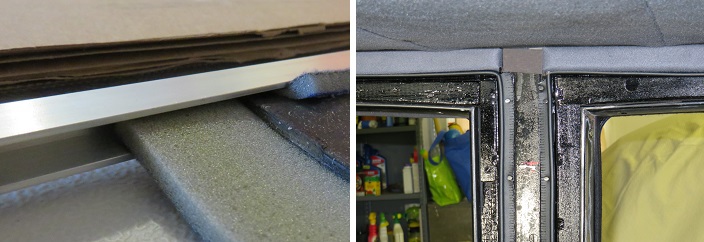
In order to get a nice clean folded edge on both sides of a board only an inch wide with tacks in the center was a little bit of a challenge. I screwed up a number of pieces until I decided to use a quarter inch aluminum 'U' channel to fold the material with glue onto the door board. This not only produced a nice folded edge but when left in place to dry provided the necessary pressure for a good sealed edge. The picture above and to the right shows the results achieved with the 'U' channel.
The pictures above show the trim pieces I made to finish off the top of the rear seat window on the driver's side. Before I start on the bottom portion I decided to work on the rear driver's side door. I used the same method to create the upper window trim.
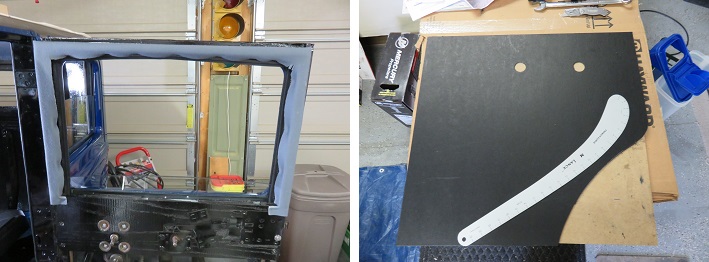
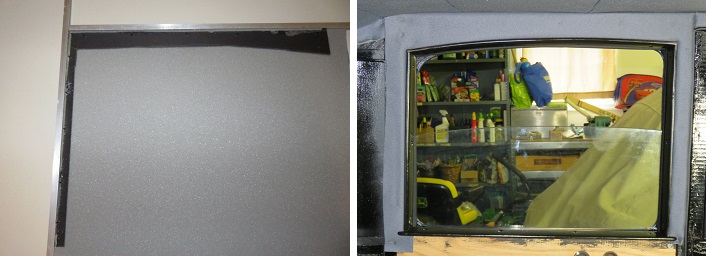
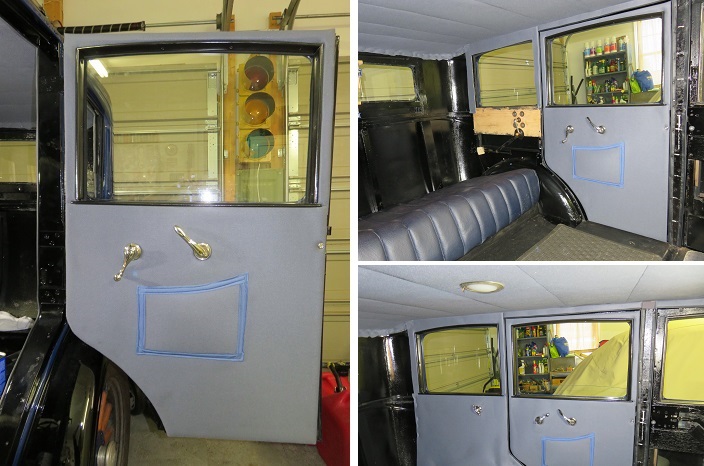
In the picture above and to the left the door edge turned out as expected. I can't install the window trim until the bottom section is completed. The bottom window trim covers the seam between the upper and lower section and must be installed after the bottom section is completed. The picture above and to the right is the bottom rear door board I created. I first did a rough trace of the door then I used a French curve to make the correct cut over the wheel well.
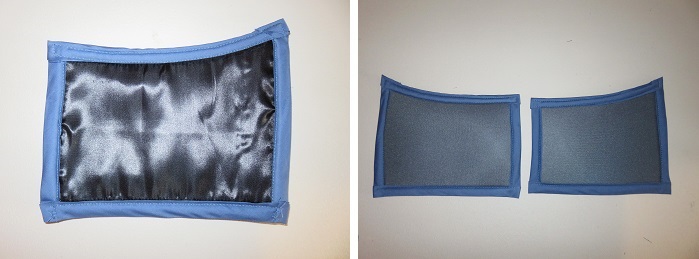
Before we can apply the material to the bottom door board my wife made map pockets for the rear passenger and the front driver's side door. These pockets are mirror images of each other.
 |
The map pockets are lined with black coat lining. The picture above and to the left shows the
inside lining and the picture above and to the right shows the lined
pockets ready to be sown to the door material. This material will
then be glued to the door board and the board will be attached to the
doors. Of course this is all easier said than done and a lot of time and effort was expended doing this tedious work. The pocket shapes are close to original. I think originally the bottom corners were curved but that would have been to difficult to do with our limited equipment and the type of material we are using. |
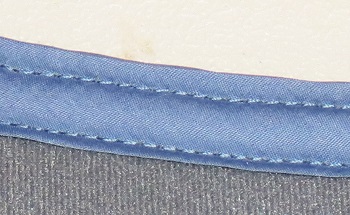
Above all the stitching needed to be as straight as possible. The square corners made this easer to accomplish. The picture above and to the left shows results of this tedious work.
With the pockets finished we cut the material needed for the rear door and positioned the pocket. The wife sewed the pockets to the door material. After this was done we glued the material to the door boards and finished the left and right edges using the U channel. The top and bottom material is stapled to the door wood.
The interior work is extremely tedious but coming along. Most of this work will be duplicated for the passenger side of the car in that all the door boards are mirror images of each other. When I created the driver's side I also copied the board for the passenger side. Hopefully the passenger side will go a bit faster.
We will continue to chip away at the interior. I think we have learned enough to speed up the process a little.