
I'm not familiar with that setup so I assume that the oil pump doesn't have the vacuum port.
- Welcome to 28Q29U Plymouth Forum.
28Q29U Plymouth Forum
News:
NEW FORUM version is here.
If you are experiencing any problems, contact chetbrz@aol.com
WELCOME Auto Registration is turned OFF.
In order to register for this forum please contact chetbrz@aol.com to request access.
This section allows you to view all posts made by this member. Note that you can only see posts made in areas you currently have access to.
#677
General Discussion / Re: A few gremlins with engine.
November 27, 2018, 10:22:40 PMI use a straight 30 weight oil initially with a zinc additive. If the vacuum fuel pump is not connected and plugged, it will drive the pressure to the high side. I would use 5w20 only as a break in oil for a short period of time. The engine is designed for 30 weight oil.
My 2 cents
#678
General Discussion / Re: Hello again
November 26, 2018, 08:00:58 PM
Really Nice. I hope mine will come out half that nice.
Great job.
Great job.
#679
General Discussion / Re: My Motor Update
November 26, 2018, 07:56:29 PMQuote from: imoore on November 26, 2018, 02:18:24 AM
Hi chet
Suggestion for when you get the engine back. Remove the oil pump, take the cover off and fill with engine oil. while pump is off and sump removed. using a oil can, pump oil into the main feed pipe. Untill you see oil working its way past the bearings. on all journals.
ian
Thanks for the tip. It's a good suggestion. Chet...
#680
Things you are looking for. / Re: Cap and rotor.
November 25, 2018, 08:23:21 PM
Nice, can you post the Napa part numbers.
#681
General Discussion / Re: My Motor Update
November 22, 2018, 10:29:34 AMQuote from: rwollman on November 22, 2018, 07:46:15 AM
Chet - have been thinking about how to prime your engine with oil before starting. If yu have the external oilvac pump this should be able to be done before installing engine back in frame. when I did my brothers restart on his 28 after storage he wanted to check pump output. We removed the pump, disassembled and cleaned it out and checked the vanes for wear. Before re-installing, we plumbed it up with copper lines on intake and return and plugged off vacuum line to fuel pump. On output side added a gate valve to supply restriction and installed pressure gauge on port for dash . Spun the pump with electric drill on shaft with intake line in bucket of fresh oil and return back into bucket. This pump would actually stall 1/4 inch drill motor. Highest reading was 60 psi. If you have same system I see no reason why this could not be done prior to installation into frame. You could use either external oil supply or plumb into oil pickup in base. Would just take a little copper line and some fittings.
Happy Thanksgiving
Thanks I was thinking about this also. Once I get the engine back I will check it out. Also I want to hear what the builder suggests to get this primed properly.
Happy Turkey day !!!
#682
General Discussion / Re: Front window mechanism
November 22, 2018, 10:20:18 AM
On my 29 the framing is wood supporting the metal skins. I believe from your picture it shows the windshield frame nailed into a wood member. The side tracks I installed without any attachment. Basically the windshield and side molding held them in place. The windshield only moves up a couple of inches so if fitted tight no problem. Of course probably not weather tight but I don't suspect that my car will be out in the pouring rain very much.
A side molding attached to the wood frame holds the sides in place. Come to think of it the window side runners have a little lip that the side molding uses to hold them in place or you might be able to tack or staple them to the wood frame. The bottom rubber fits into the windshield's bottom molding. The bottom molding has a metal track that the rubber sits in and can be silicone sealed but here again in my car just held in place by the metal track. You can probably fit the rubber bottom molding to put pressure on the side channels to also hold them in place when you open the front windshield.
My 2 1/2 cents, Chet...
#683
General Discussion / Re: Dashboard FYI
November 21, 2018, 10:06:19 PMQuote from: abradney on November 21, 2018, 11:22:07 AM
Wow, wish I had read this sooner, my car arrived with 2 of the screws missing, I ended up tapping out to 1/4 20 for the two that were missing and was able to get exact same looking screws to replace.
Sounds like a good fix and if I had missing screws I think I would do the same. Trying to find the right profile in 1/4 24 didn't have a lot of options.
 Chet...
#684
General Discussion / Re: Front window mechanism
November 21, 2018, 10:01:24 PM
I am not that familiar with the newer style 30U but will try to answer your questions because I believe they are very close.
What do the channels down the side of the window 'frame' look like?
In the 29U they are 1/4" channel very similar to the regular window channels. They are available from Steele Rubber.
Here is a link to the two side pieces and the bottom rubber Kit#70-0016-52 For 1930U Plymouth same as 29U
https://www.steelerubber.com/windshield-weatherstrip-kit-70-0016-52
How was the original wood mechanism mounted?
I believe the same as your picture.
What is the profile of the lower seal, and is it rubber?
YES Contained in the Steele Rubber Kit
Cheers Chet...
#685
General Discussion / Re: Hello again
November 21, 2018, 09:05:48 PM
Hi Ian
Looking forward to the pictures. Chet...
Looking forward to the pictures. Chet...

#687
General Discussion / Re: 29 Build Thread - Part 2
November 18, 2018, 02:55:34 PM
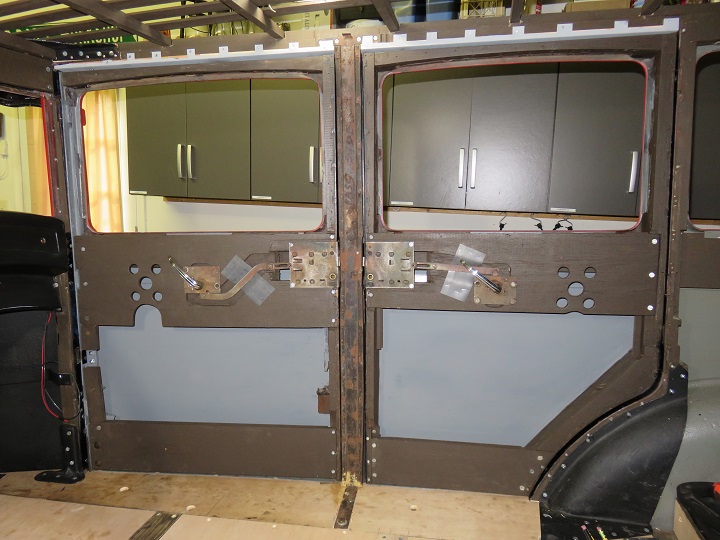
Prep for Paint - Last of the Door/Door Frame Repairs.
I started on this in June and over the summer have been distracted by a number of things but this weekend I finally completed this section of my project.
Due to the length of this task and the number of pictures I posted a link to the blow by blow description below:
http://www.1948plymouth.info/1929/Work_files/2018/11182018.htm
Link to prior door frame repair June 10, 2018:
http://www.1948plymouth.info/1929/Work_files/2018/06102018.htm
Chet...
Link to Build Thread Part 1
http://www.1948plymouth.info/28Q29U/index.php?topic=1102.0
#688
General Discussion / Re: Model U Distributor Housing
November 10, 2018, 02:45:42 PMQuote from: frankp on November 09, 2018, 09:50:57 PM
Well Chet, your homemade base may not score high in form, but in function it gets a 10! Nice work, as usual! frank
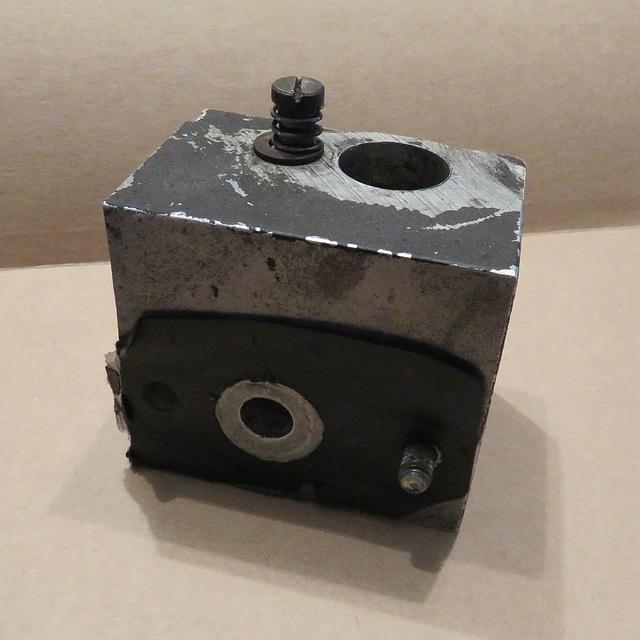
Thanks Frank but I can't take credit for the homemade distributor block. It was on the car when I bought it. I figured I would spend a couple of additional bucks since I have invested so much in the engine rebuild. The new housing will look much better than the block. I hope it will remove the occasional engine cough at idle. The block's aluminum drive shaft hole was badly worn., so trouble in the future was just around the bend. I intend to drill a larger hole and press in a 1/2" bushing. I'll keep it as an emergency spare.
Started back on the body work. I am finishing up the passenger side doors and upper steel door frame. It's good to get going again.
Cheers, Chet...
#689
General Discussion / Re: Model U Distributor Housing
November 09, 2018, 12:09:42 PM
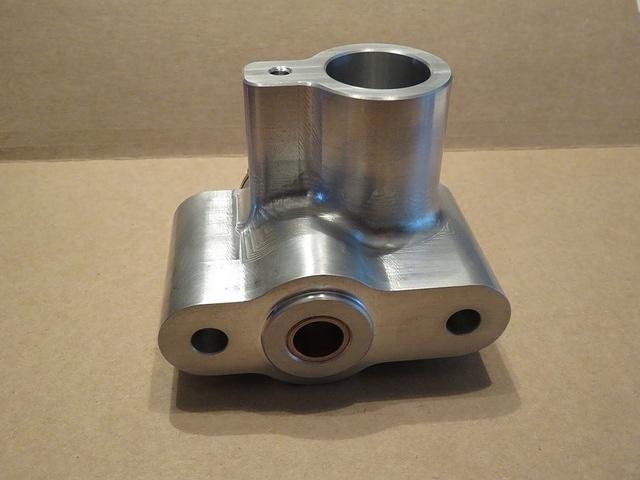
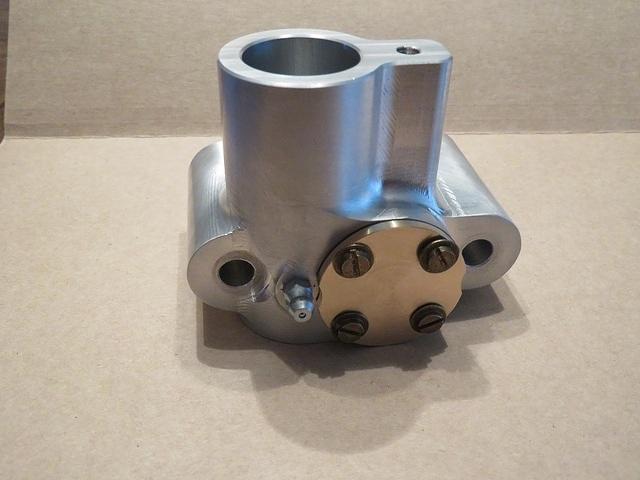
UPDATE:
I received the new distributor housing from the eBay seller in Germany. The part looks great and mic's up correct. My motor is still up in Massachusetts but I don't think there will be any issues installing this item. Of course some slight fitting might be required but we will see. Otherwise, it seems a lot better than my homemade distributor housing which has run my car for 10++ years. Cost $399 + $50 for International FedEx Shipping.
My old homemade base. Which still works just fine.
#690
General Discussion / Re: My Motor Update
October 30, 2018, 03:19:00 PM
Hi Dave,
Sounds like you removed that protective coating of dirt, grime, & soot. I myself have been doing other things besides working on the Plymouth. The whole motor snafu and power failure to the workshop knocked the wind out of my sails but we might be coming around to clear sailing again. The power line to the shop has been replaced and it looks like progress on the engine. Also I have been waiting for a dock site for our boat for the last two years and finally one came available for next season. Put two coats of bottom paint on the old girl for next season. Just finished today. Due to weather a two week process of removing the boat from the trailer, sanding, cleaning, and painting the bottom, winterizing the engine and putting the boat back on the trailer. A 21 foot Chris Craft not an easy task for the wife & me to do by ourselves. But done !!
Hi Frank,
Nice to hear from you. Hope you are having better luck than I have. Looks grim to have the 29 ready for summer but who knows what the fall and winter might accomplish. Especially with power back on. Everything is back from the plater and just waiting on the interior door handles.
Chet...